Custom Search


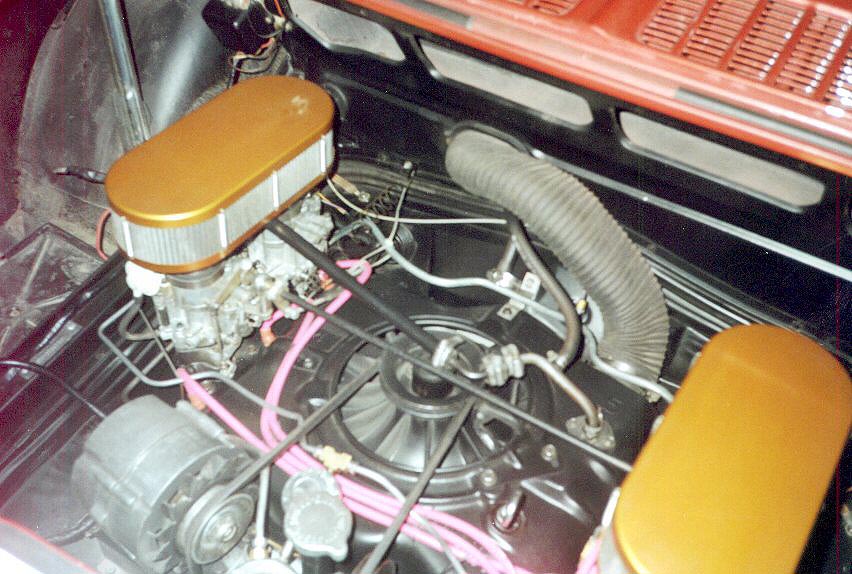
Stock: As far as the SCCA is concerned, you can't do anything to the stock carburetors, however the CORSA rules allow turn cutout fixes. I do not advocate cheating, but in this case you simply won't have any fun at an SCCA event without doing a little work on the carbs, especially if you are running a DOT race tire. Modify your stock carbs by relocating the jets as detailed in Seth Emerson's instructions, and modify the vernts per Chuck Armer's vent tube installation instructions.
Street Prepared: IMHO, carbs are the biggest obstacle to a decent E/SP Corvair, totally stock carbs really don't work in corners. Due to the rules, you are stuck with the stock intake manifolds, which can be modified to Yenko specs. This means you can port the manifolds and bore the openings, but the log manifold cannot be removed nor can any holes be added.
This leaves us with a few different options:
Prepared: Basically you have two options here - Rochesters modified any way you like, or triple barrel Webers. If the Rochesters are bored, with relocated jets and vents installed, they are adequate - but the Webers do offer somewhat better throttle response and much better tuning possibilities. This does come at a price, of course.
See these notes on Weber setup for Corvairs:
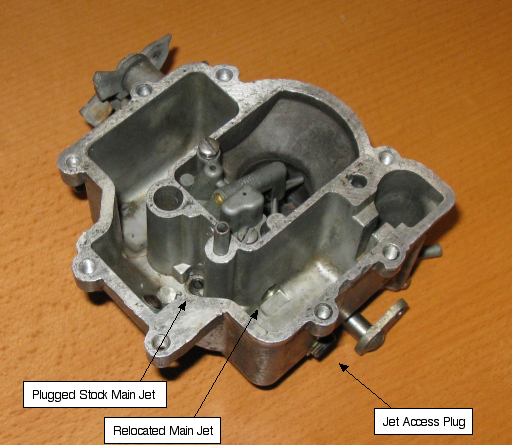
Seth Emerson wrote me a note regarding relocating the jets:
Your question on the modified jet carbs - I may have been the person who redid those carbs, I've done 40 or so. My normal method of modification was to remove the aluminum plug installed in the wall of the float bowl after they pushed in the high speed enrichment restrictor. I then opened up the hole to allow me to drill through the body into the inlet point for the cluster feed. This passage replaces the feed through the original main jet location.
Two things result, though. You must plug the original main jet hole, I use a allen type screw. You must also plug the high speed enrichment feed to the cluster, a vertical hole, because the new passage goes right past it and will feed it raw fuel. I tap the hole and plug it with another set screw. After I've drilled through to the main well, I counterbore and tap the hole to allow the jet to be installed here. With the counterbore, the jet moves out of the way of the float. The pipe plug you see is needed to access the jet for removal and replacement. Sealing it in the thin wall of the float bowl will always be a problem, be careful.
The advantage are twofold. With the carbs mounted in the original positions, i.e. not rotated, the fuel is fed from the front or rear of the carb (relative to the car). This makes it less susceptable to cornering force. Corvairs do not have enough acceleration to cause front to rear starvation, and while the brakes might be able to do it, who cares under braking! The second advantage is you can change jets without taking the carb apart. It's tricky, but you can do it. on two of the 140 carbs you have to remove the carb to get to the plug but it can be done.
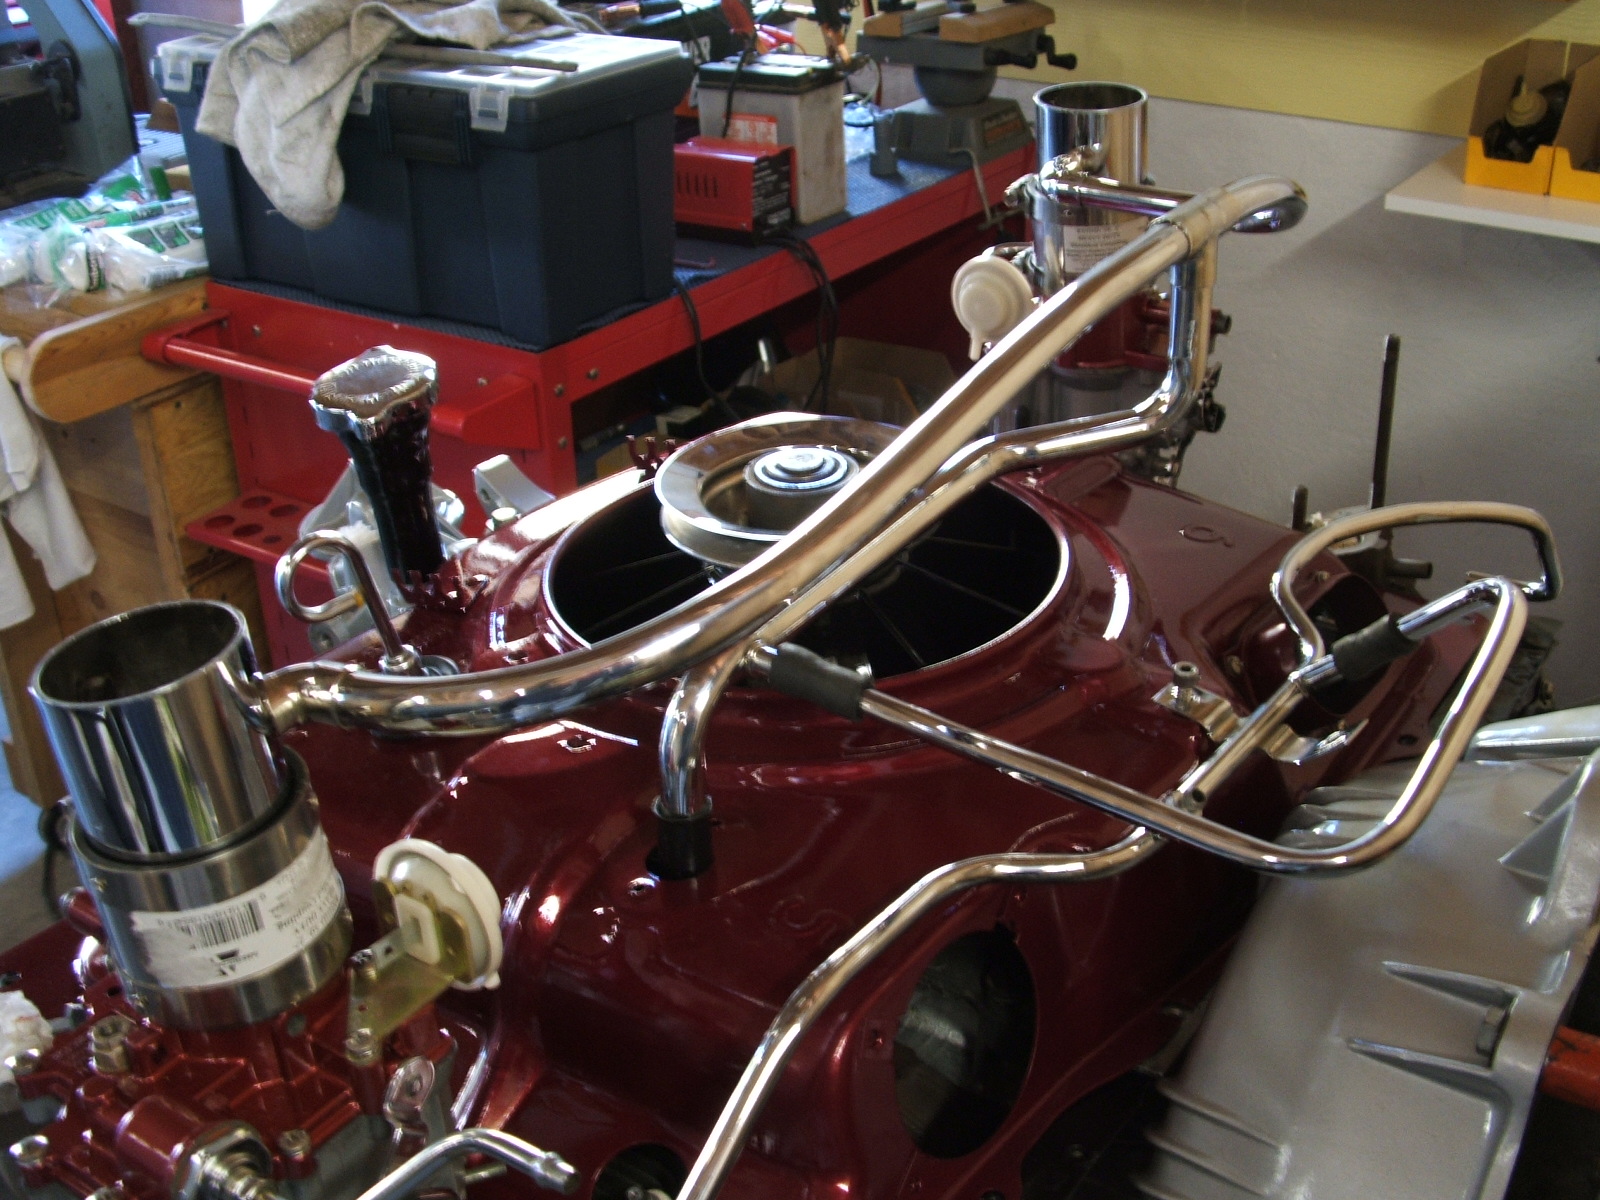
Andy sent these photos and captions of some really beautiful work:
| Click on an image to see the full size version. | |
|---|---|
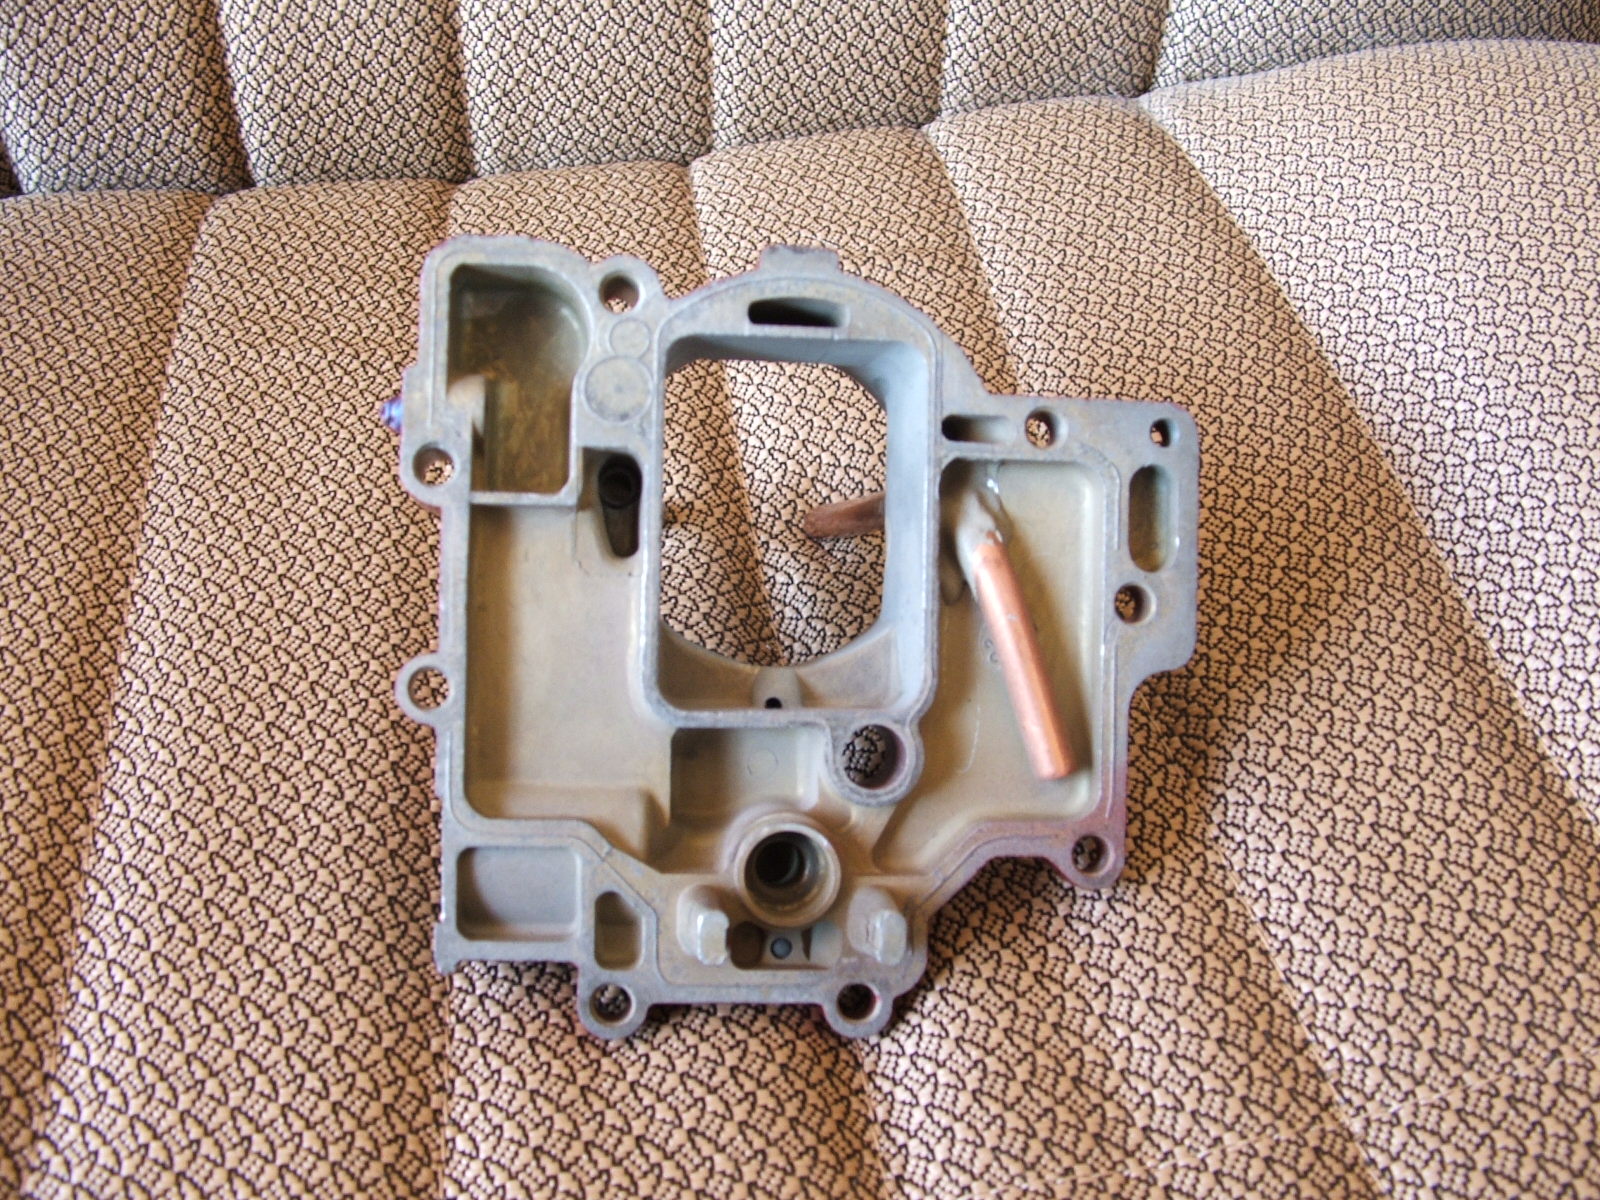 One carb vent goes to the forward end of the float bowl and the other dead-ends at the bottom of the stock vent. Under acceleration, the fuel sloshes to the back of the bowl, but BOTH vents remain open. Under deceleration, who cares, but the back (short vent) is still uncovered. |
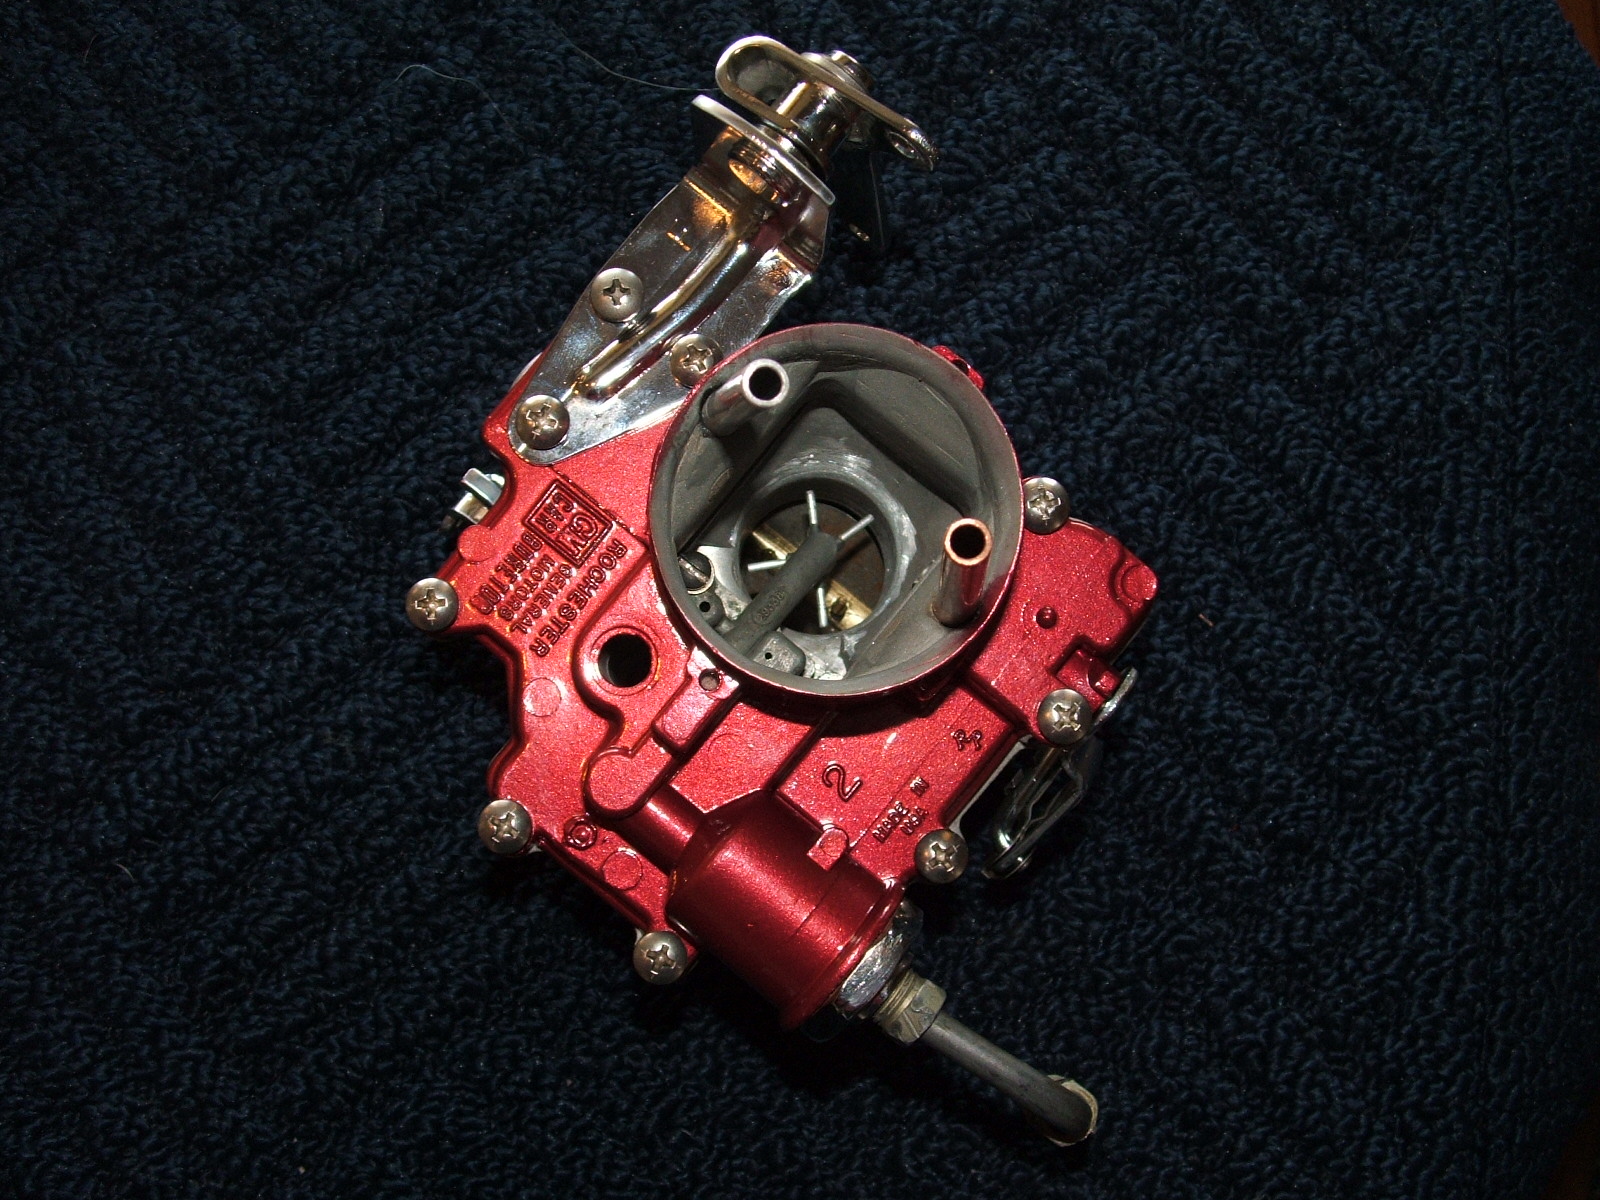 Secondary venturis opened up to 1.30. Custom cluster arms can be seen. |
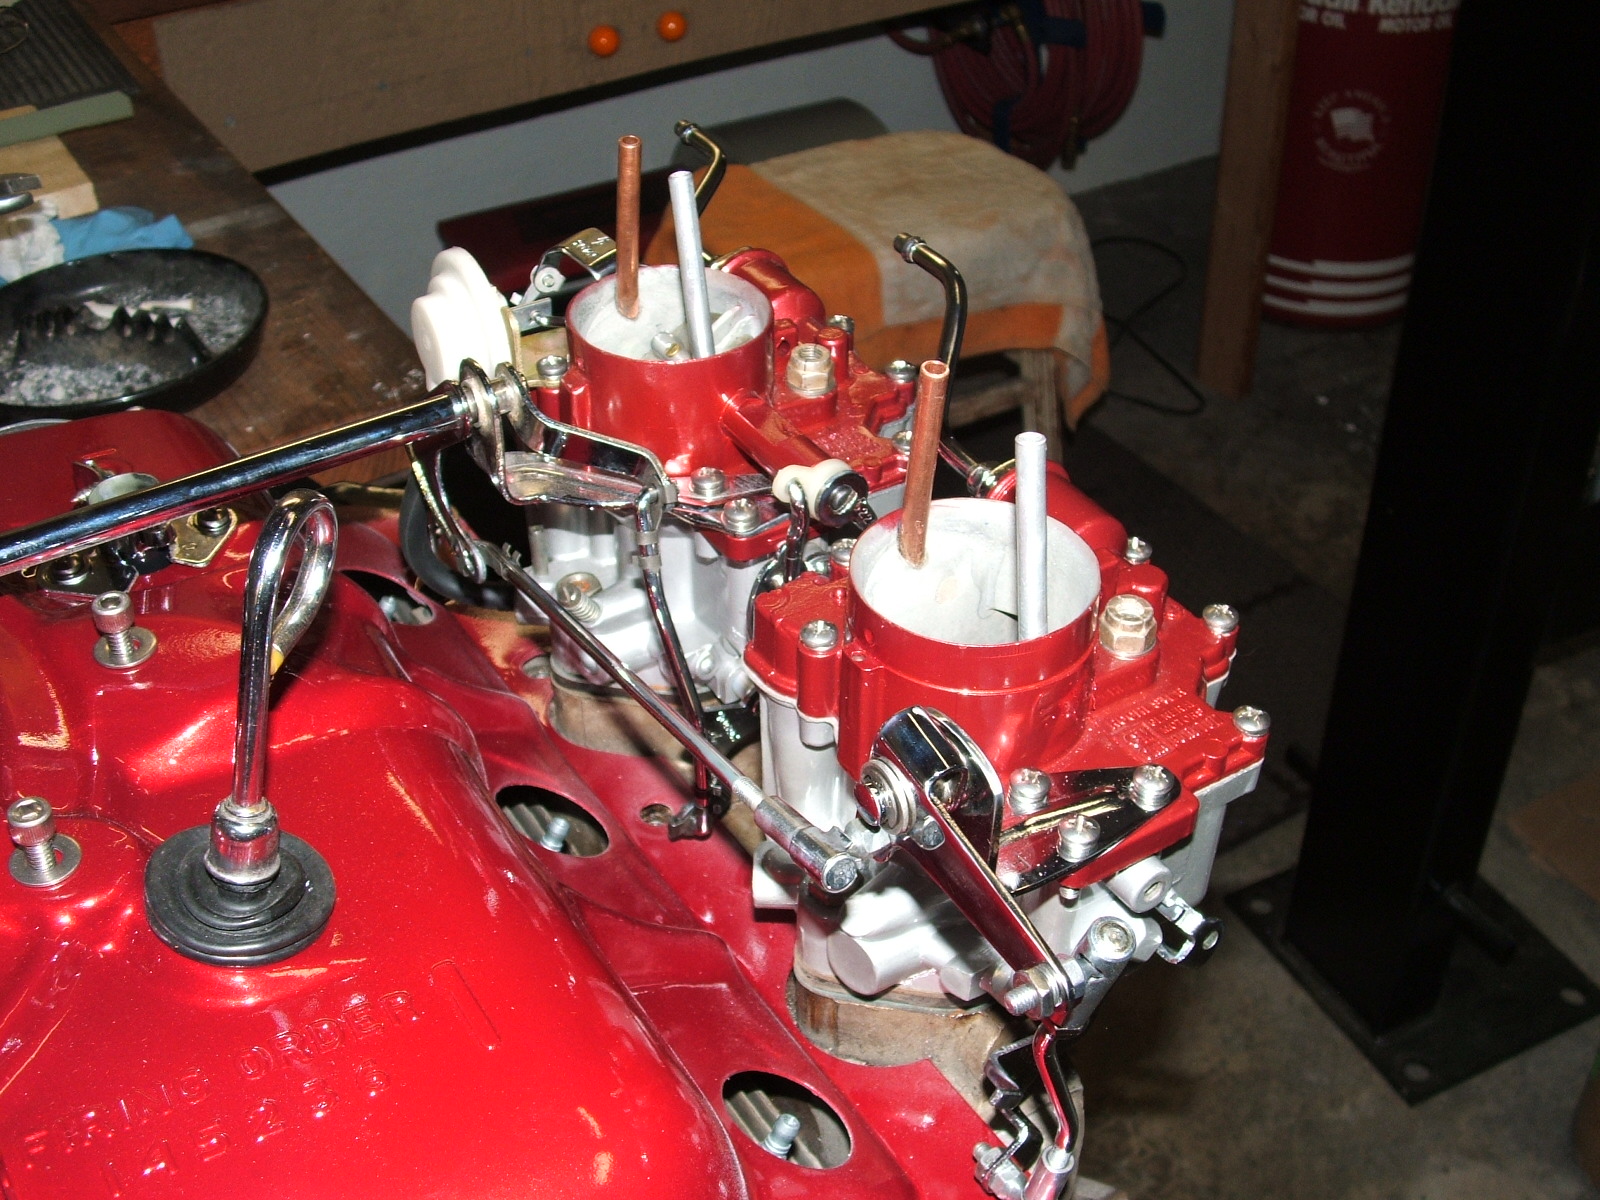 The copper tubes are the long vents and the aluminum ones are short. The use of different material vent tubes is only to be able to easily identify which vent goes forward (the long one) and therefore which carb(s) go on which side of the engine. |
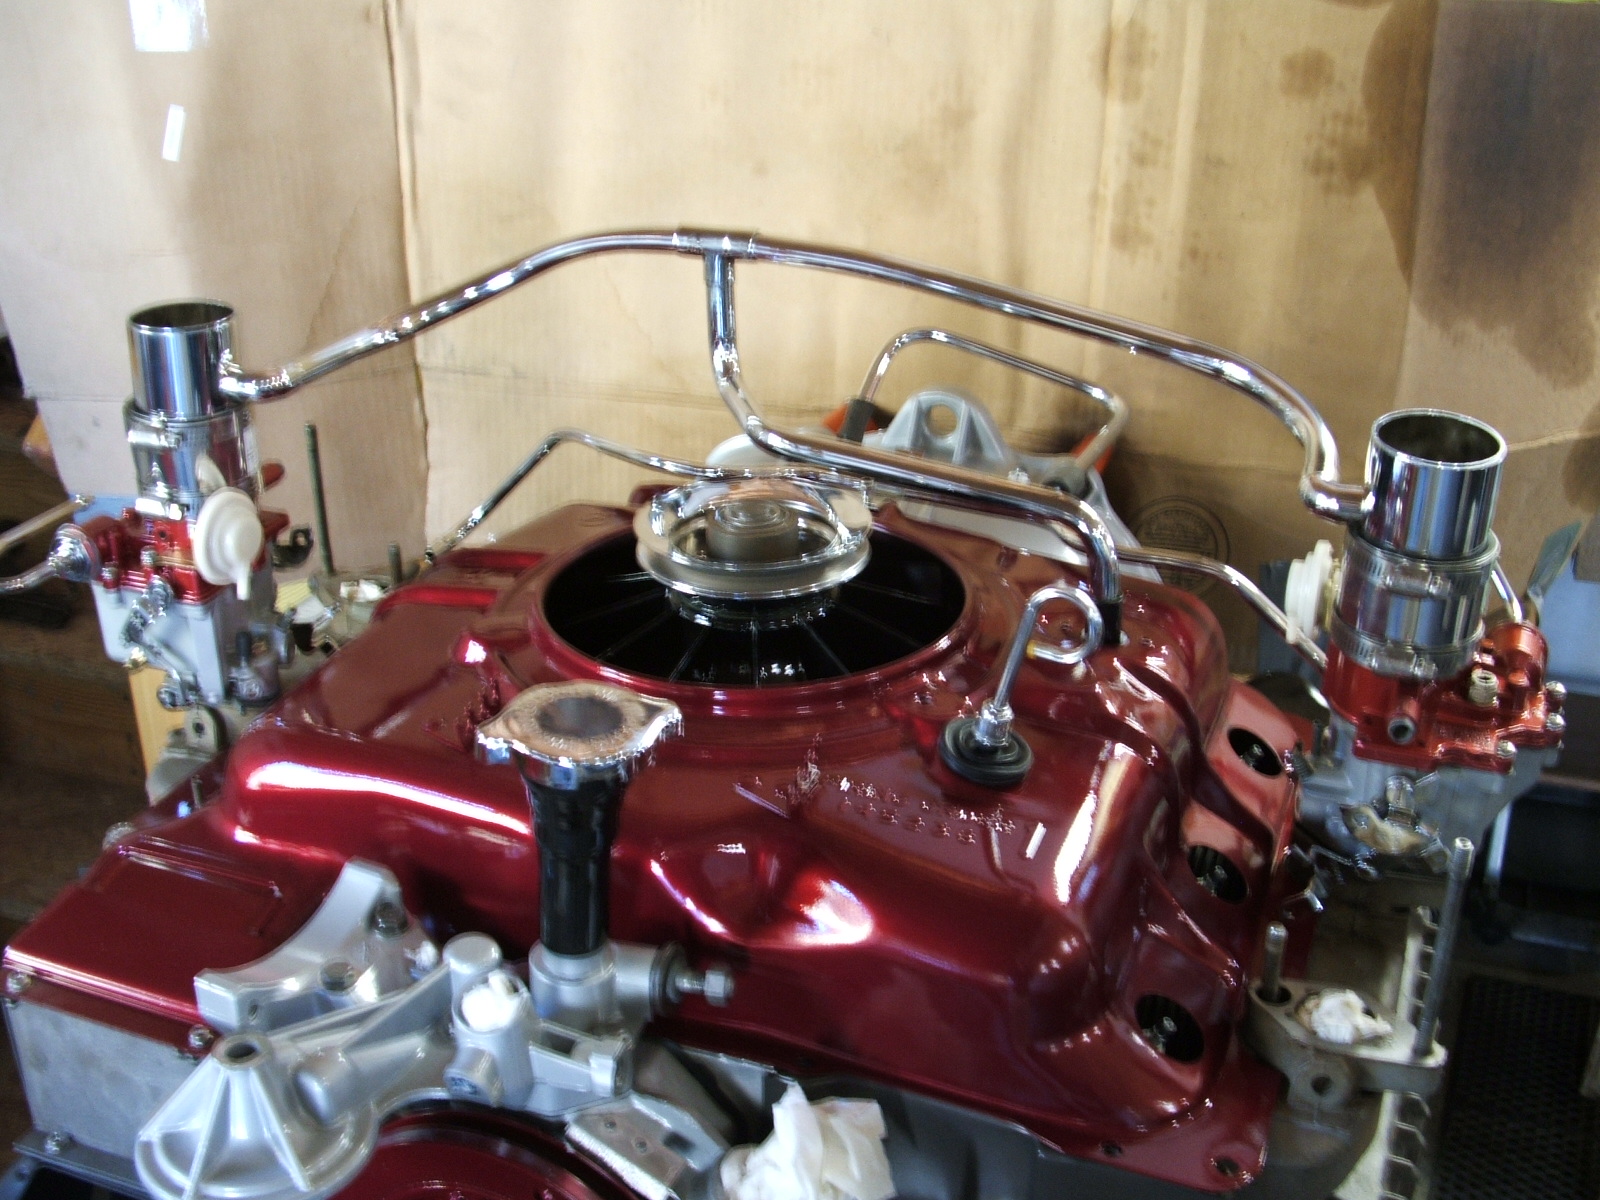 Crankcase vent plumbing. The small tube in the background is the PCV vent to the cross-over tube. |
 Another view of the vent system with a better look at the PCV vent tube |
 |
 |
 |
| Images courtesy Andy Clark. | |
Kent Sullivan asked:
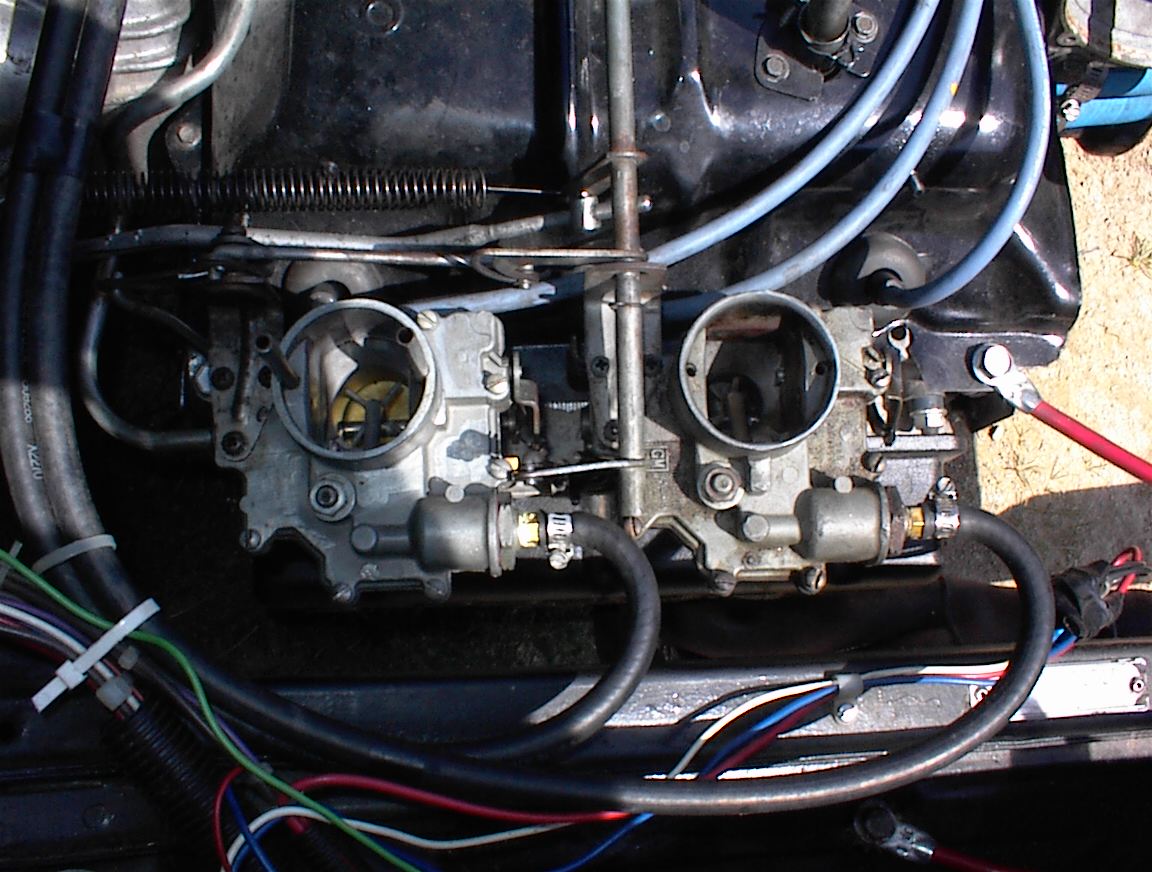
> Clark's (Otto Parts) setup (C8647) that uses four primary carbs, rotated, with true progressive linkage seems like a good place to start (maybe). Has anyone used this kit? It's fairly inexpensive (~$160) and offers two main advantages: progressive nature may reduce starving problems under heavy load and rotated carbs don't starve in corners. Is it overall a better choice than #1?
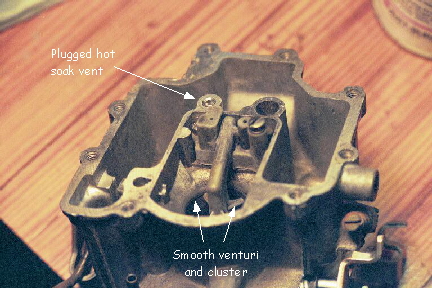
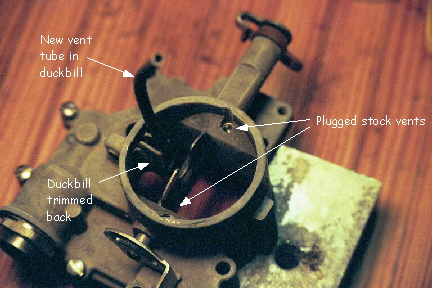
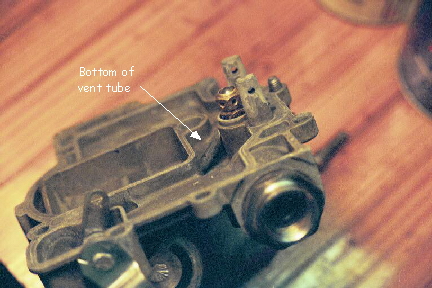
This is the kit I currently have on the coupe. You don't really need four primaries; what you do need are four carbs with accelerator pumps. '66 carbs fit the bill nicely. A disadvantage with the kit is that *any* amount of throttle past cruise engages the secondaries - forget what they say about "no effect on mileage"!! The kit did cure the starvation, though, but I'm still coping with flooding. Changing to "duckbill" vents pretty well fixes that, along with plugging the hot soak vent (the one that goes down to the carb base). Here a some photos of one of the primaries (click to enlarge):
 |
 |
 |
Big advantage of the kit is that the car starts and runs the way it's supposed to, idles nicely, etc. Couple notes:
Bob Gilbert offered the following observations on the same kit:
In response to a couple of queries, here goes...
Not to start out negative - but here's a list of the problems...
Now for the good news...after lots of fiddling it does work and the performance improvement is noticeable - especially while driving enthusiastically! I haven't got everything dialed in yet so I'm still tinkering. Also, the heim joint setup for the x-shaft is superb and I wish you could buy an equivalent for say a 110. As I said before, the installation fit my 80-20-80 rule. Overall I'm happy but it could have been made sooooooo much easier with a few improvements.
Thanks, Bob Gilbert.
Note: Bob sold this car to Joel Rushworth, who sent me this picture of the completed installation.
Click to enlarge.
If you are planning to install the Grose-Jet inlet valves (the all-metal ones that use two balls to seal), here's something Larry Claypool pointed out:
i have used these type of needle and seats many times before with great results. because they are bigger in OD, you may have a situation where the arm of the float is rubbing the side of the seat assy, preventing the contact tab from fully depressing the ball. check that the motion of the ball into the seat is actaully determing your float level, not the arm against something else before you give up on them.
I also ran into the following:
I seem to recall having this problem with mine as well - some judicious bending of the float arm was needed to get it to clear the valve. On one carb, I then had the problem that the arm then rubbed the bowl - in this case it wouldn't let the valve *open*. More bending, and all was well. Don't forget to then check the float height and drop once you've got the things in. Moral: "Bolt-on" parts - usually don't.
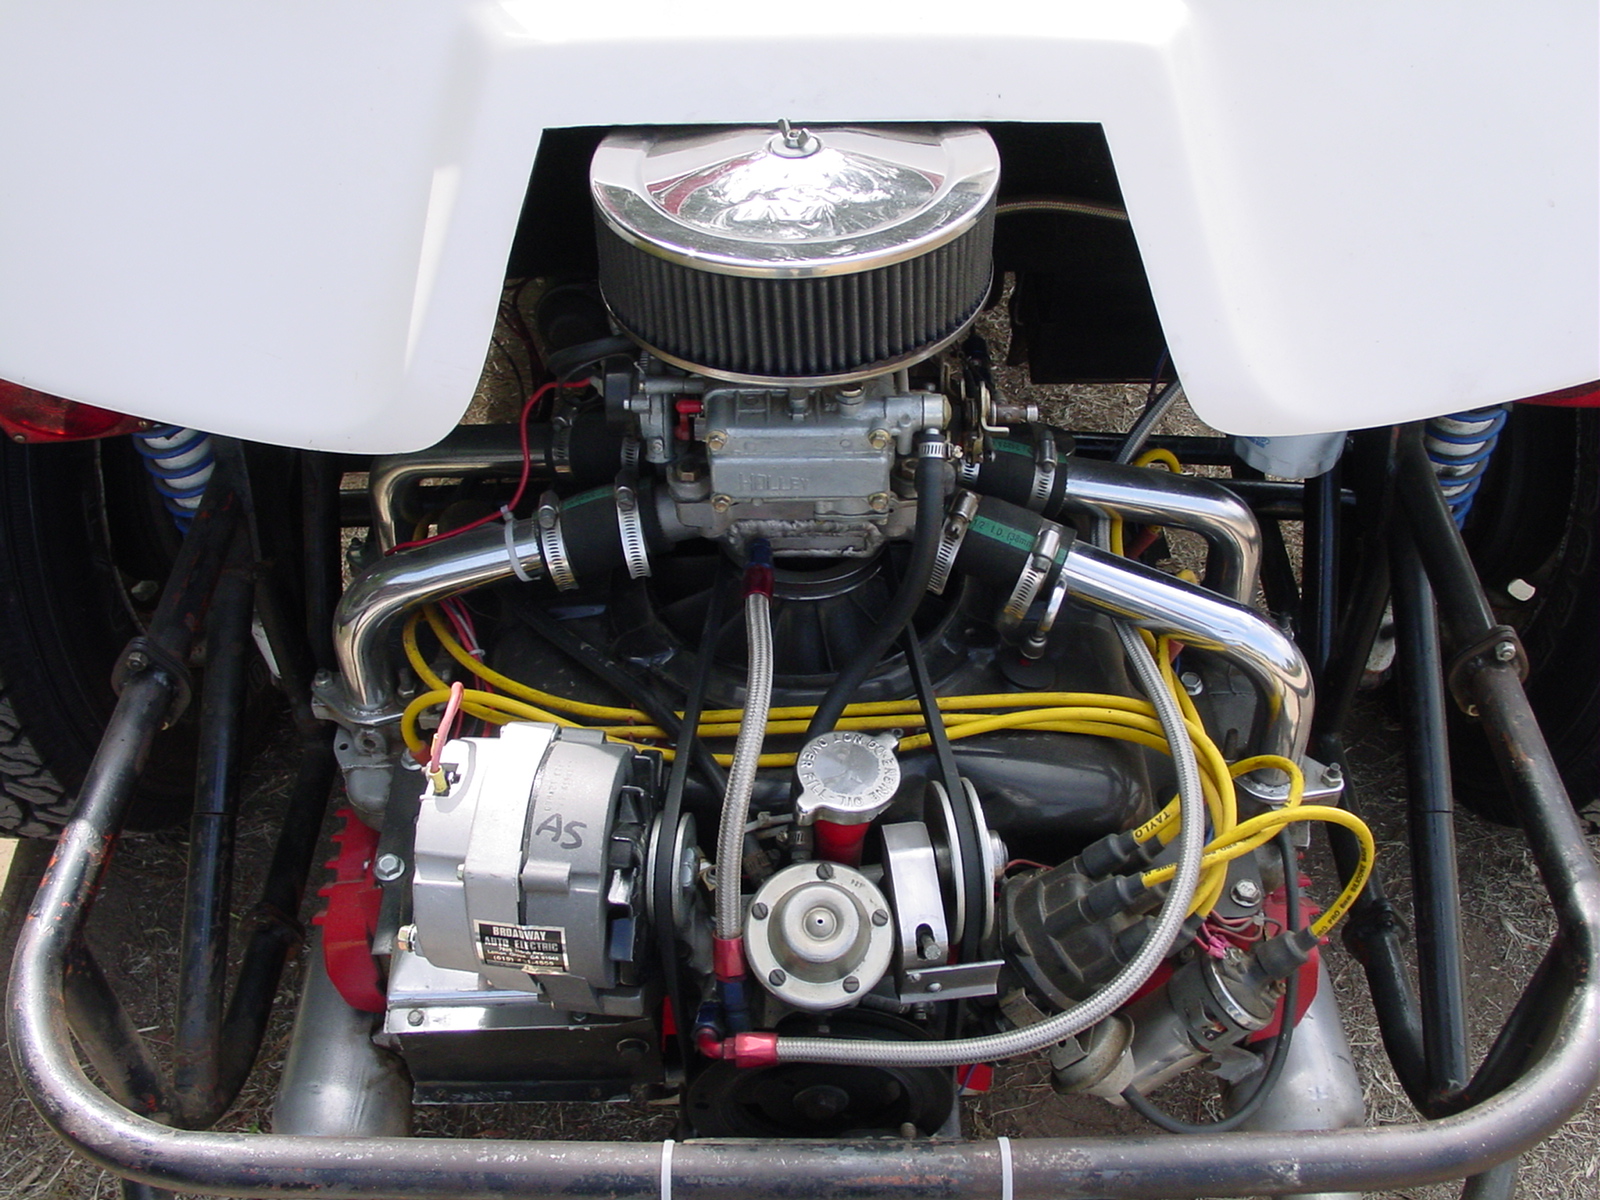
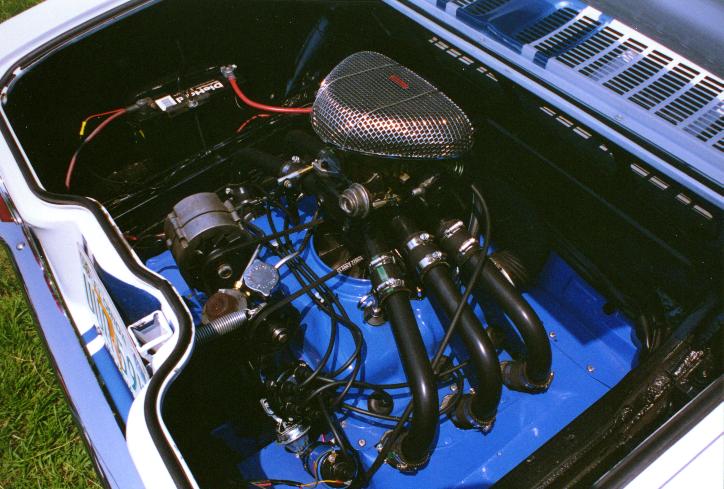
Finally, here's a neat idea. One of the possible modifications involves boring the carbs for more airflow. This is good for power, but not so good for idle and low end throttle response. If you're familiar with the concept of a spread bore four barrel, here's the same idea applied to Mark Gillespie's Stinger:
First, let me comment that the center mount four barrel which uses a four leg manifold to mate to the stock 140 carb pads has been heavily criticised by a number of folks who have spent a lot of time tuning them. The problems can be solved, but it is not a bolt on proposition and you really don't get much if any extra horsepower over a set of good Rochesters. The chief reason why folks did this was to get rid of the linkage and turn cut out problems, tho this can be solved as shown above.
However, if you mill off the stock intakes and run a six tube intake which mates with the individual ports, this can be very worthwhile. By removing the extra plenum volume the throttle response is much better, and there is a lot less restriction in the intake, which leads to more power. Be aware that this setup is only legal for SCCA in E/Mod at this time. Ken Klingaman has such a setup on his Stinger, and he passed on the following link to an excellent article on Holley carb tuning:
http://www.bob2000.com/carb.htm
And here's a shot of one:
If you do want to try a Holley, on either manifold, here are some other notes from Jim Burkhard:
BTW, before I get started... If you don't have a 140, you definitely don't want the 4-BBL. The 4-BBL only starts to come into its own at high airflow. Non-140 heads are intake restricted at higher power, so bolting the 4-BBL on will just make a bog-factory with few pluses.
If you do decide you want a Holley, go with the #8007. It's a 390 cfm model (the smallest 4 BBL), with vacuum secondaries and an electric choke. The carb is of the 4150/4160 series (the most popular Holley's); technically its a 4160 series, because it has a secondary metering _plate_, rather than a complete secondary metering _block_. The 4160 series are just 4150's that have been slightly cheapened up with a cheaper secondary metering circuit. The plate-based system can be changed to metering block if you want removable jets for the secondaries. This would make it into a 4150. I didn't bother.
There is also a #6299 390 cfm Holley that is available (often at Vair flea-markets, when people are trying to unload it). You don't want this one. No electric choke. It may also have mechanical secondaries (I forget), which suck on the street.
Also suggested with the #8007:
- The high volume (50cc) accelerator pump kit. You'll need it to try to cover the massive drivability hole when the throttle opens at low airflow. A necessary band-aid I'm afraid.
- The thermistor-sensor electric choke gizmo. I forget what they call this, but it's a ring termal with a thermistor on it that attaches to the electric choke ground. It'll make the choke open as a function of engine temperature (use an upper shroud bolt) rather than time. Definitely improves cold drivability.
- Quick change secondary spring kit. Gives you a bunch of different springs and a new 2ndary diaphragm cover to let you tune in the secondary opening flow point and rate. This might be 2 kits, not one (a spring kit and a quick change kit). You'll need the spring kit (I think the secondaries open too fast out of the box); the quick change kit is suggested, but optional.
- Accelerator pump cam kit. This is a whole bunch of platic cams that you can swap in and out to get the pump shot just right. You'll need this if you don't want a bog every time you give it gas.
- Primary Jets -- I think I wound up enleaning mine a bit
- I recommend reusable teflon fuel bowl gaskets if you're gonna screw around with jetting. The stock pressed paper stuff is only usable once, and you'll spend a lot of time scraping otherwise. DON'T reuse the stock ones!!! A leaky gasket is quite hazardous, since the float bowels are side hung (= constant gasoline leak onto engine).
- A good linkage kit. I think the one I have came from Clarks a long time ago. It's OK.
- A good stopwatch, notebook, seat 'o pants judge of sag, bog, stumble, etc. Take notes!!!
All in all, it's a lot of work to get it to run acceptably (maybe I'm fussy). >95% of people would be much better served with the stock carbs (maybe some mods to these). "Some day" I'll switch back to the stock setup.
Jim made some other comments recently, here they are:
These things have a zillion places to leak gasoline and it is quite simple to torch a car via neglecting them. Lets see... 2 vertically gasketted removable float bowls each with a sight plug, 1 main gasket, 1 metering block gasket, and 4 retaining screw gaskets! Add in the 2 O-rings on the primary-secondary crossover tube and I think you get at least 16 places that carb can pee fuel fast. There's probably a couple more spots as well. Anyhow, please be careful if you want to tinker with one of these. And, if you buy one, you are going to _want_ to tinker with it because out of the box it with run like crap.
When tinkering, it is very easy to get sloppy about changing gaskets and O-rings. Bad idea... Corvairs burn. Performance places (such as Jesse's favorite, Summit) sell teflon reusuable gaskets for the metering block, float bowls, and float bowl screws & these are a _great_ idea but you need to keep the screws tight and check for leakage frequently. I wipe my finger on the bottom of the bowls occasionally to see if any "weepage" has started. Don't forget to buy a bunch of spare o-rings for the end of the fuel tube that connects the primary and secondary bowls. I don't think a reusable replacement for these are sold (might be wrong though). They should be changed whenever a bowl is removed though... they swell and it's easy to get one cock-eyed or torn. Use silicone O-ring grease, not vaseline, which can attack some rubbers (don't say it... fight it off... AGh!~)
One final piece of advice: Keep the stock 4x1 setup intact and protected. Maybe mount it to a piece of plywood and put the whole thing in a big plastic bag (drain the carbs first). There is a VERY good chance you (or a future owner) may someday want to return to this.
An extra suggestion from Mike Mann:
As far as icing we used a chrysler air cleaner that had a hot air intake. Drilled a hole on the upper shroud just behind the oil cooler, mounted a round tube on a flat plate, riveted to the air box, then ran flex tubing from it to the air cleaner. Very simple and effective. Some winters here (Utah) get down right cold but the car never gave me any problems.
Another way to solve the icing problem from Dan Petz:
And here's some further info on the vaccuum secondary springs from Seth Emerson:You can solve the engine heat problem by changing the steel runners to thin gauge aluminun ( 0.023 wall ). We had the same problems w/ center mount 4 bbl carb. The heat transfer on steel is bad. We spigoted (tight fit) the tubes into the heads & sealed w an 0-rings instead of a gasket. Hope this helps. Turbodan
The opening rate of a vacuum secondary system is controlled by the diaphragm spring located in the vacuum secondary diaphragm housing. A "lighter" spring will allow the secondary throttle plates to open more quickly. A spring assortment kit, Holley P/N 20-13, is available to help you "tailor" the secondary opening rate to your application. A "quick change" kit, Holley P/N 20-59, is also available for fast and easy access to the spring. It consists of a two-piece secondary diaphragm housing cover which, after it's installed, can easily cut in half the time required to change the secondary spring.
Check www.summitracing.com for easy pricing. - Seth Emerson
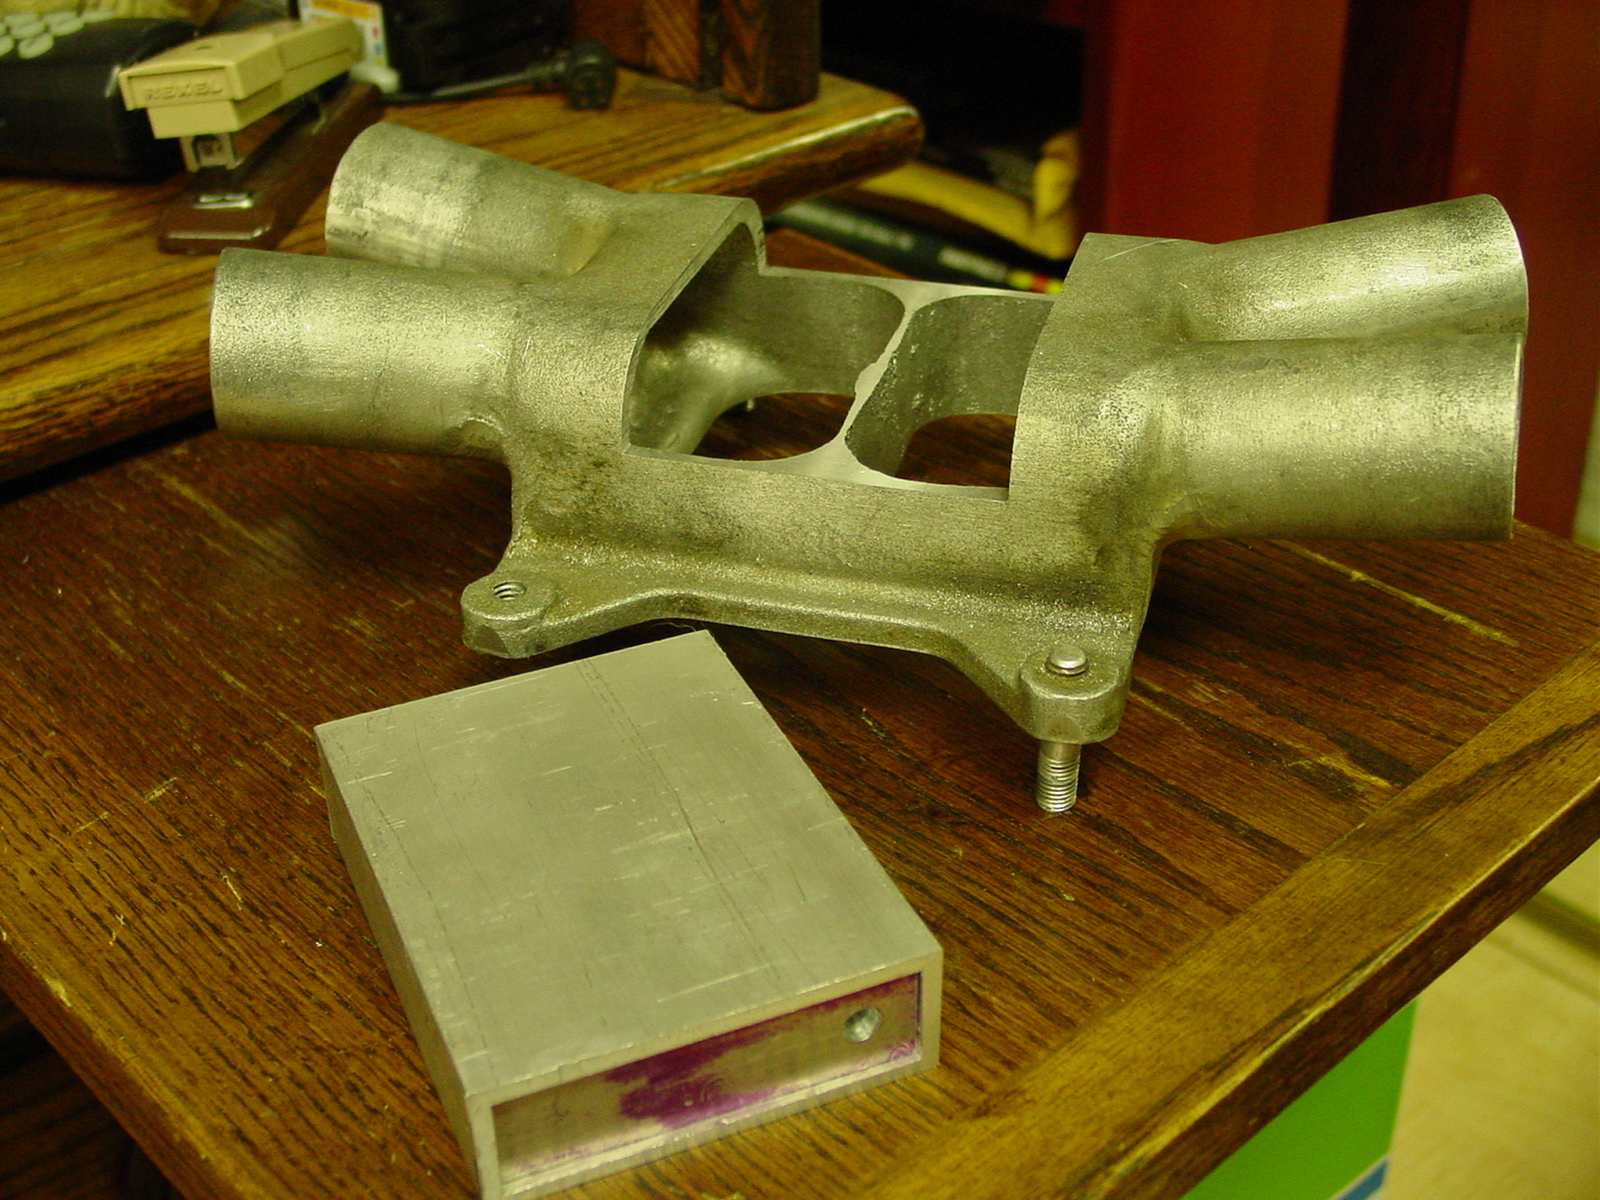
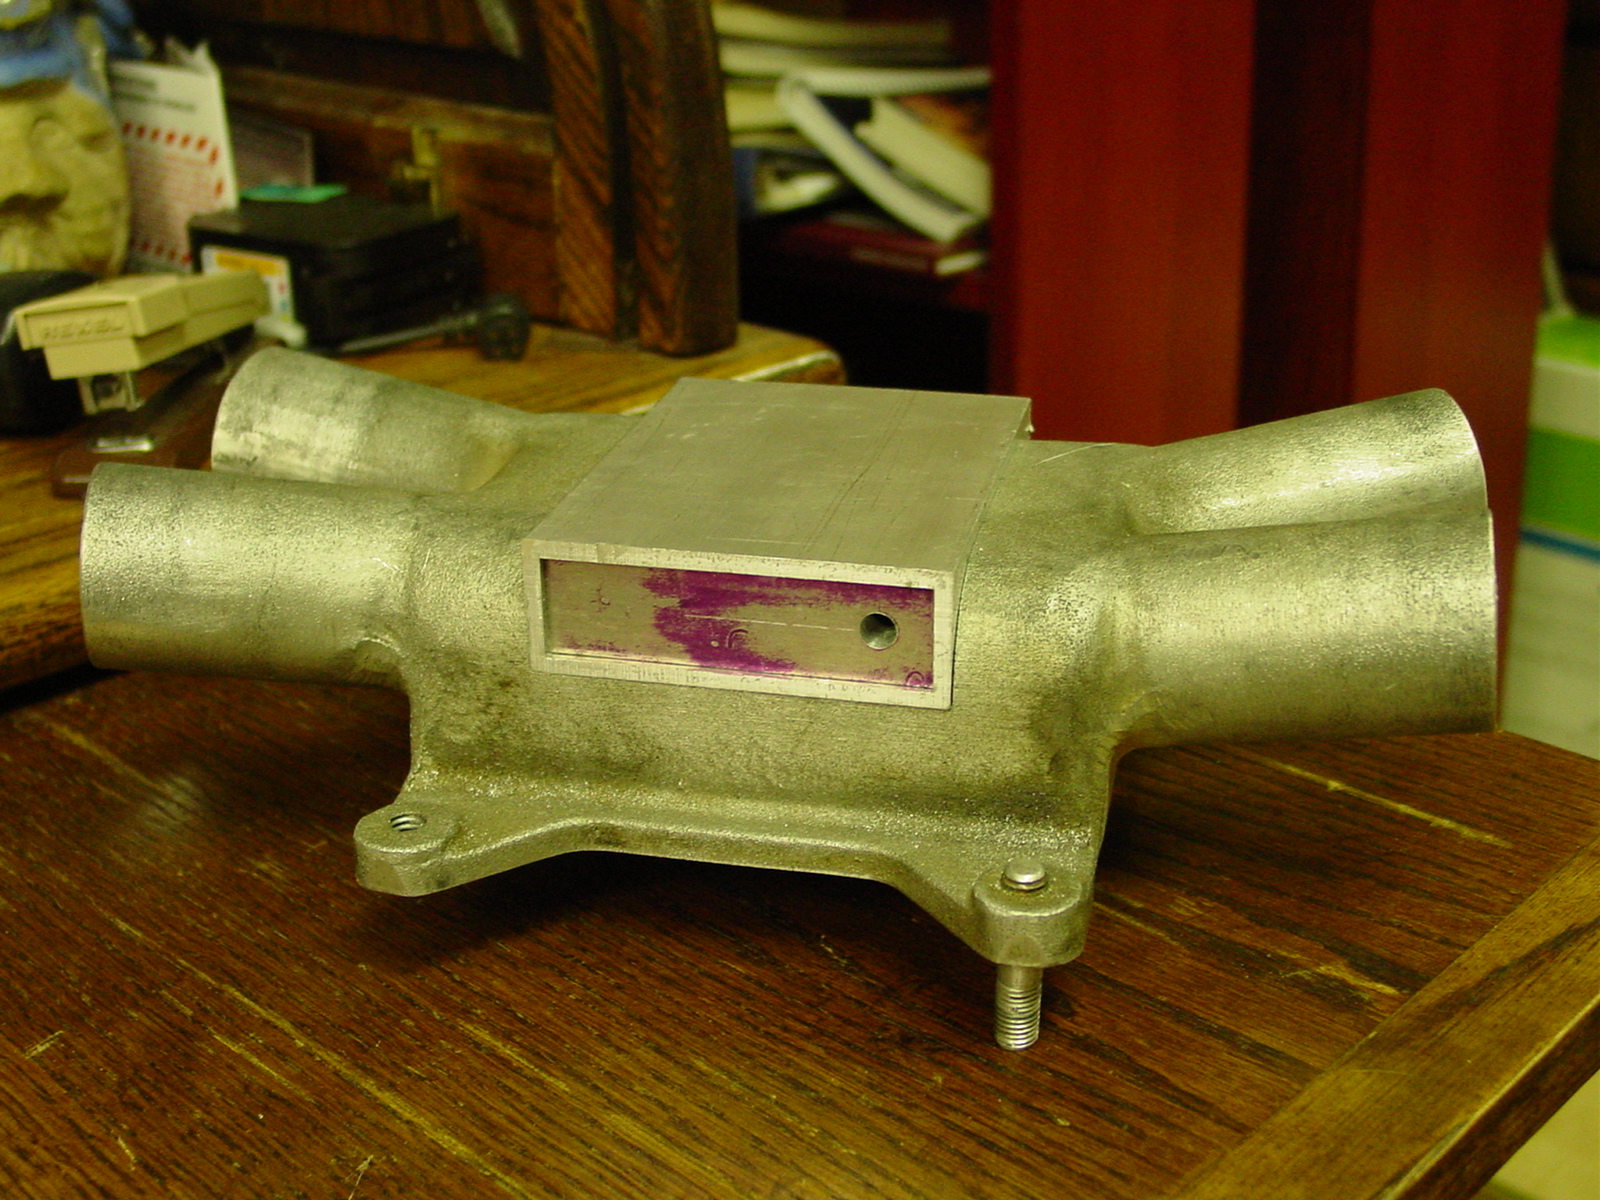
Mike McCrae sent the following tips on how to make a center four barrel work, along with some photos of the mods for heat.
No one, VW, GM, etc. has ever made a remote carb work well without applying heat to the manifold. There is a very simple answer which I provide, and solves these problems. The bottom of the four barrel intake manifold is machined away, and an aluminum box is fabricated and tig welded in place to carry engine oil. The oil comes from the oil filter log which I machine off. A remote filter is then used on the return line from the heater box. This system not only heats the plenum, it cools the oil as well. The oil leaving the manifold is generally 10-12 degrees cooler.
Click on an image to see the full size version. Images courtesy Mike McCrae. Exhaust could be used for heat if one wants to replumb an AIR exhaust manifold. The perfect example is the single carburetor VW engine. All carburetors become refrigeration systems, due to the Fuel/Air (F/A) compression in the venturi and idle systems and later expansion in the plenum. All modern engines compensate for this phenomenon by locating the carburetors over the oil valley in a V-8 or V-6, or over an exhaust manifold in inline engines.
Corvair engineers wisely mated the intake manifolds directly to the head, keeping the F/A mixture warm and in suspension. The lack of heat to the remote 4-barrel manifolds we use allows the F/A mixture to condense on the sides of the frozen plenum, creating a very lean situation, and resultant hesitation (lean skips). Winter operation becomes almost impossible due to carburetor ice formation with resultant frozen idle circuits. Most folks compensate for the problem by using the 50 cc accelerator pump and fire-hose nozzles. The result being poor gas mileage and extreme dilution of the oil at the top compression ring. With my system, one can use the stock Holley accelerator pump and normal nozzles.
My suggestion for initial carburetor settings in the Holley 390, 4160 series is as follows:
- Stock accelerator pump (NOT the 50cc)
- .031 Accelerator pump nozzles
- .057 primary jets
- .059 Secondary plate jets
- 75 power valve
- Bowl vents extended
- Internal baffles
- Power valve protection
- Spring loaded needle & seats
- Electric choke
- Purple secondary diaphragm spring
David Clemens posted the following to FastVairs, this should make a good starting point if you're going to run a set of these carbs:
I ran 40 IDA3C with 34 mm choke tubes on my car for a while. My set up was the following:
55 idle jets
145 main jets
F26 emulsion tubes
180 air correctors
34 mm choke tubesBefore going to this setup I had been using the F1 emulsion tubes and the carbs hit a brick wall at around 6000 rpm. When I switched to the F26 tubes the car pulled to 7000 easily.
The motor had 12.5 to 1 compression Arias pistons .040 over and the cam was a solid lifter 304 intake/314 exhaust duration, lift was about 550.
It has been noted on FastVair that Webers don't like a lot of fuel pressure, here's what Stan East had to say:
In general the recommendation for Webers is 3.5 psi, 4.0 psi will often over come the needle valve seat causing flooding. Note, many mechanical and electrical pumps exceed this requirement. If fuel pressure is too high the carburetor will flood and cause an engine fire. The best setup is to use a good quality fuel pressure regulator after the pump and just before the carburetors. Remember also that the fuel delivery rate needs to change as rpm increases therefore the pump if electrical must be capable of appropriate gallon per hour rates at the high rpms without over powering the needle valve seat [using a pressure regulator as noted above, perhaps with a pressure gauge, is a good idea --BB]. Mechanical pumps will compensate to some extent as rpm increases. Weber floats can also loose their seal and fill up with gasoline causing all kinds of problems, usually flooding, until you discover the source of the problem. (Don't ask how I know).
If you have the triple Webers you should own all the books you can find on Webers so you become knowledgeable on how to tune them. My list includes
- Weber Carburetors by Pat Braden.
- Master Catalog Technical Introduction by E. Weber Fabrica Italiana Carburatori
- Weber Carburetors 1 Theory by John Passini
- Weber Carburetors 2 Tuning and Maintenance by John Passini
You also need a range of air and fuel jets and maybe even different emulsion tubes to get the tuning right.