
Custom Search


Rick Norris did an install of the Otto "carb rotator" kit, available from Clark's, on his track car. One thing I realized after reading this - it may not clear on my carb page that there are two installations. Mine is like Rick's, with the jets to the rear. The one Bob Gilbert did follows the instructions with the jets to the front.
Having just finished a Rotated Carb Kit install I thought I would write a piece on the experience. I decided to do this because my track car has the usual cut out in high G turns. I have the extended vents so this was the next logical step. I had two choices here. I could have the carb main jets relocated or go cheaper and try Clark's carb rotator kit. I chose the latter. Cheap is subjective!
I read the information posted on Bryan Blackwell's site which was a "stock" install meaning the way the kit said to do it which orients the main jets to the front. This according to those who know is not the best, although I gather it works okay in that configuration.
The race car guys say the jets should be oriented to the rear which makes sense to me. This way the jets will be covered in all but the braking phase which does not matter.
As anyone who has installed any "bolt on" kits knows, they ain't! It's no different here even in the stock configuration and when you change that it gets even more interesting.
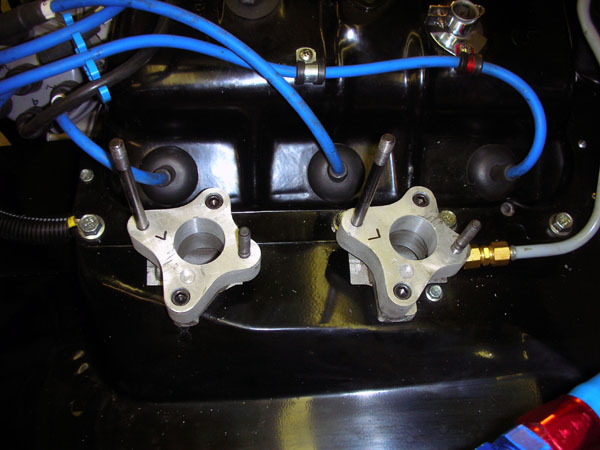
The first thing I did after removing all the carbs, linkage, carb studs and fuel lines was to mock assemble the kit according to the instructions which are not concise by any means. This will get you familiar with the various parts and pieces and how they are supposed to work. My kit came with everything needed to do the job.
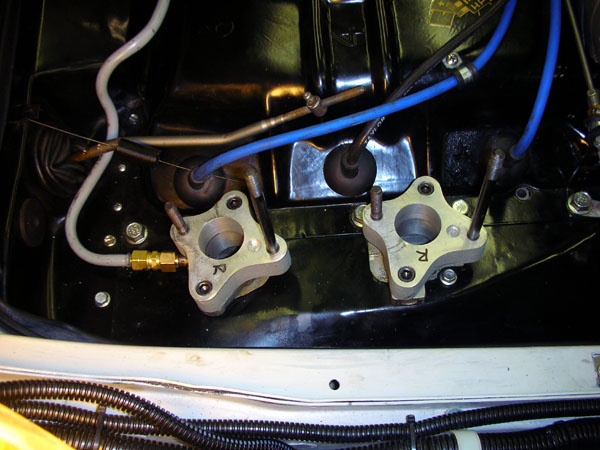
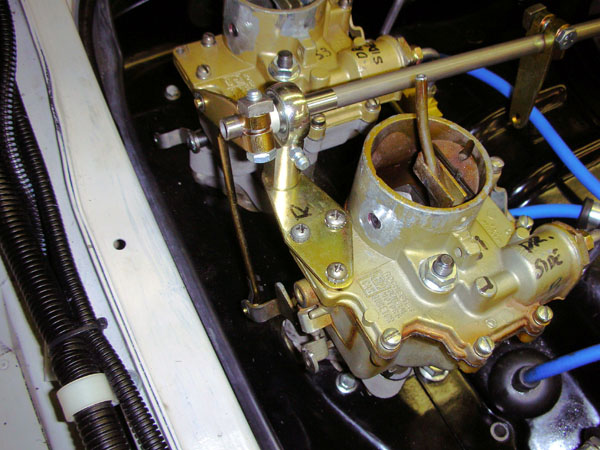
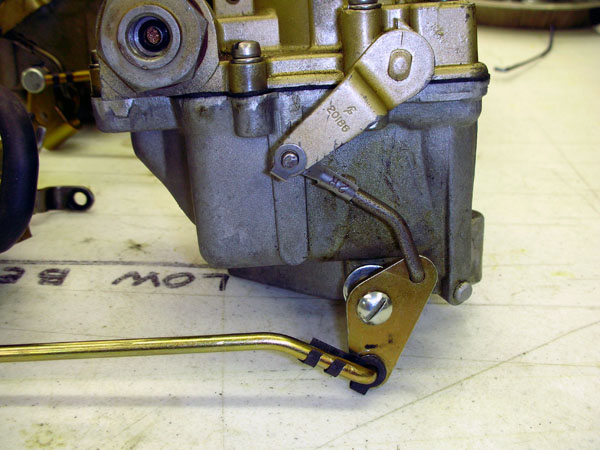
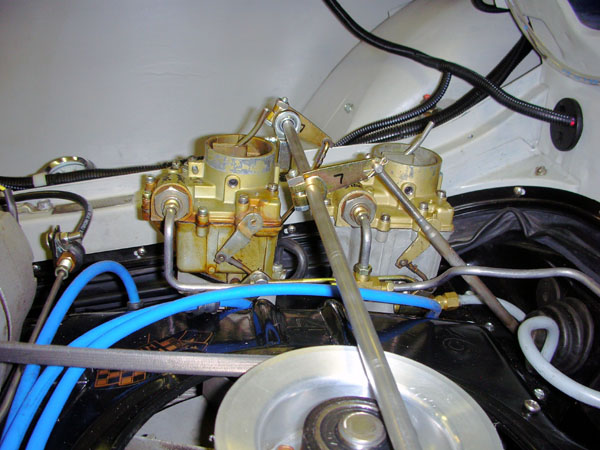
Once I became comfortable with which part went where I reversed the aluminum pad adapters left for right and right for left. They are stamped with an L or R. All the long carb studs go to the rear of the engine and short ones to the front. Next I put the carbs on in their respective positions for a check fit being sure all the main jets faced to the rear.
 |
 |
 |
 |
 |
|
 |
 |
|
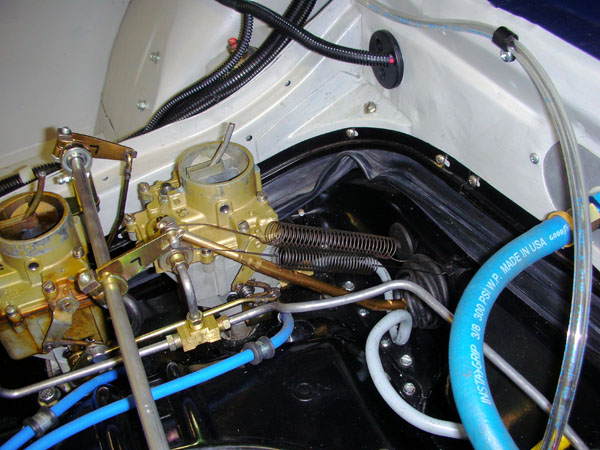
| Initial test fitting. Click on an image to see the full size version. | ||
|---|---|---|
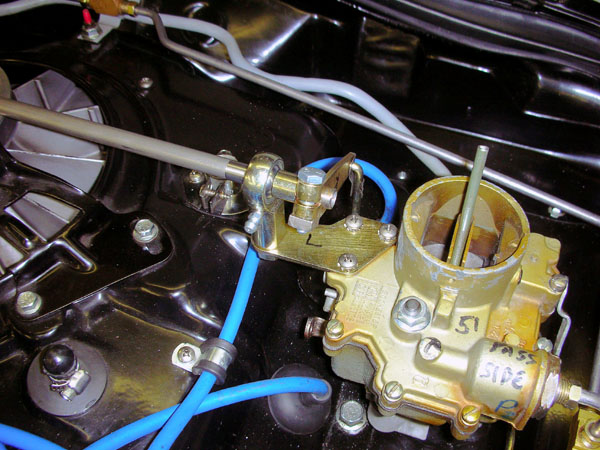
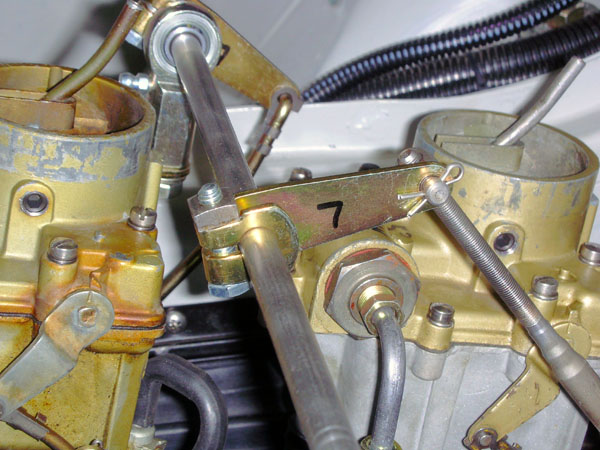
Linkage is swapped left to right and right to left also. This means the U shaped arms go on the left carbs and the flat arms go on the right. The arms in the kit replace the short arms that work the accelerator pump linkage on the side of the carbs. The arms with the slotted holes are for the primary carbs which provides the progressive motion and the arms with round holes go on the secondary carbs.
 |
 |
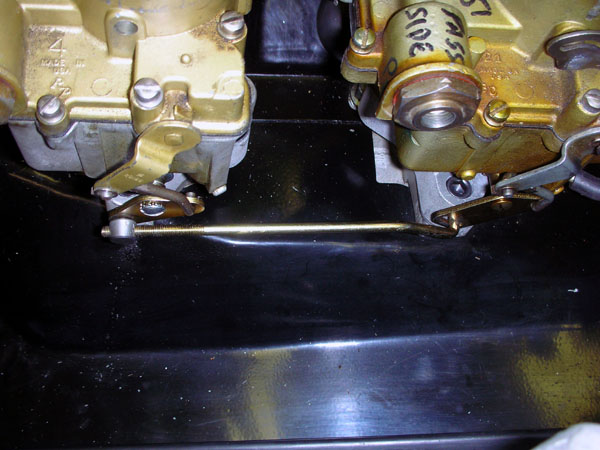 |
| Primary to secondary linkage. | ||
|---|---|---|
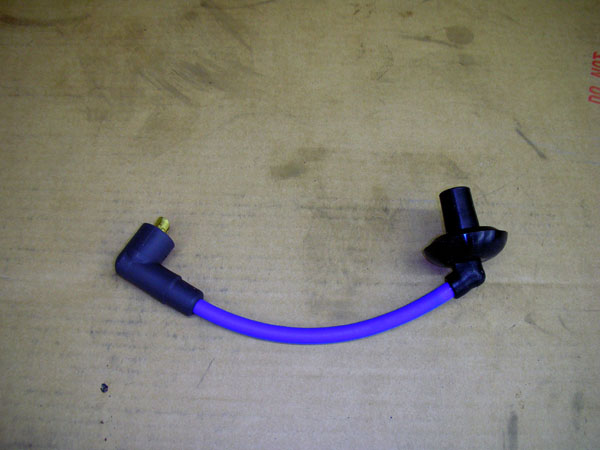
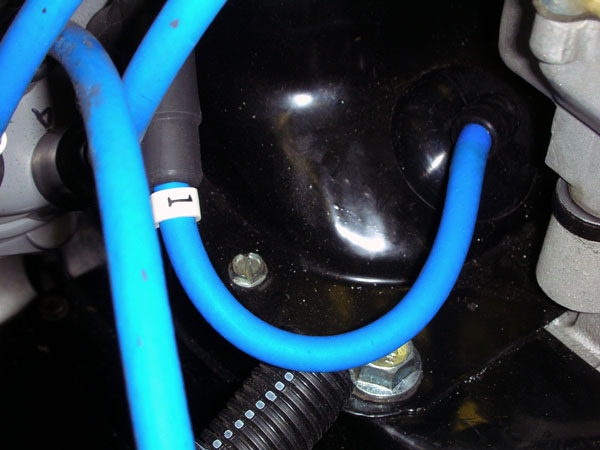
The U shaped arms mount the linkage up higher on the left side carbs which is needed for clearance over the plug wires for No. 4 and No. 6. This was still not enough so I changed the plug boots to the Clark's 90 degree style. I also use Adel clamps to hold the wires in place on the top shroud. The trick to using 90 degree boots was to stuff the large 8MM wire through it. The secret is to remove the distributor end connection and push it through with the help of some silicone grease. Ru-glide rubber lube would probably have worked too. I re-crimped the connector on using a plug wire tool made for it. For the 90 degree boots at the distributor I used some left over parts from my V8 plug wire sets. The No.1 plug wire was changed to 90 degree boots too. It was contacting the edge of the right hand secondary so I decided to change it while I was doing the others. It looks better too. On the subject of spark plugs, it has never been real easy to get to most of the plugs on a Corvair. This feat remains with about the same degree of difficulty as a stock arrangement.
 |
 |
|
| Plug wires with straight boots caused some clearance problems. | ||
|---|---|---|
 |
 |
|
| New boot on number 1 plug wire. | ||
 |
||
| Plug wires number 1, 4 and 6 with 90 degree boots. | ||
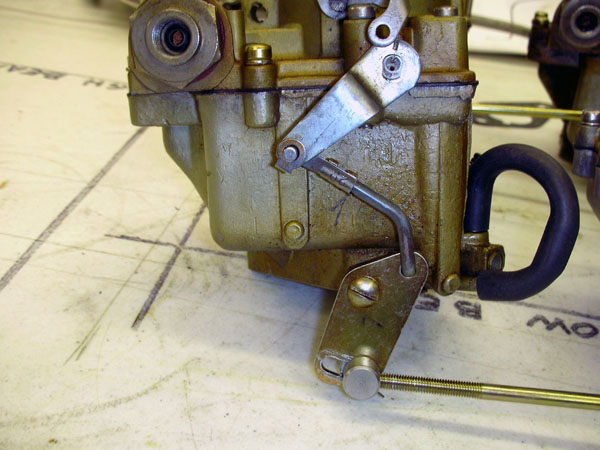
The right side linkage with the flat arms is positioned outboard of the carbs but it has other clearance issues. The corner of both the aluminum rotator pads interferes with the ends of the linkage. This was cured by grinding about 3/16" off the ears. There is plenty of meat here to do this. The linkage in the kit uses the stock type standard clips to secure it to the arms. These clips are a bit too tight and had some burrs. A little reworking with a file and some bending fixed it. The new linkage is a very snug and requires a lot of "futzing" to get it working smoothly. In one instance I had to drill the piece for a small cotter pin and washer to get it working to suit me.
| Right side primary, before and after. | |
|---|---|
| Right side secondary, before and after. | |
 |
|
| Link end with cotter pin. | |
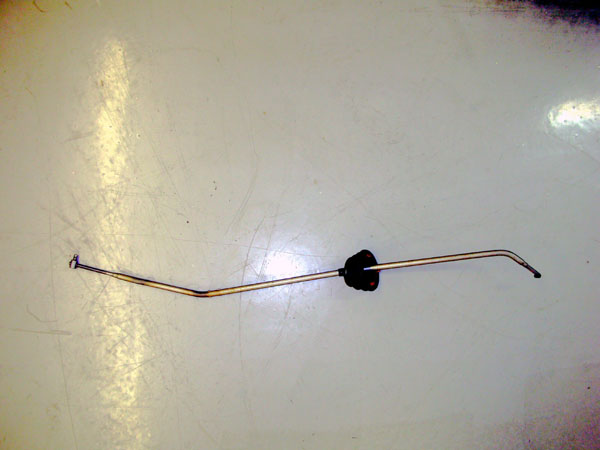
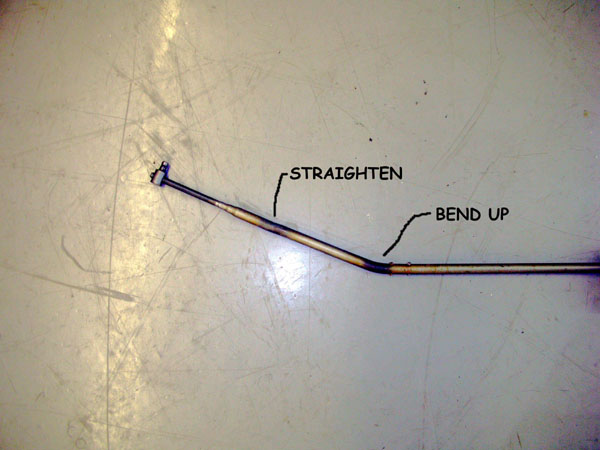
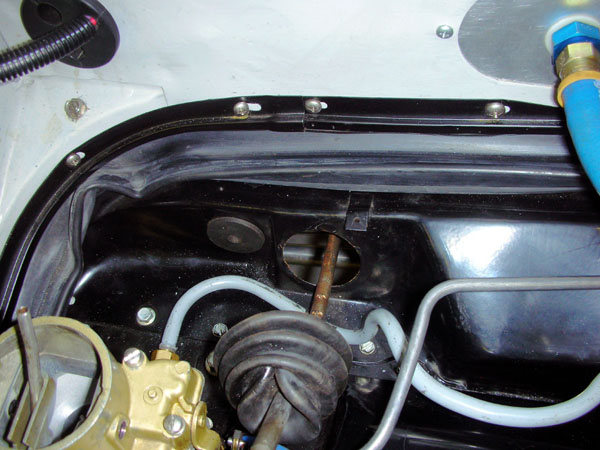
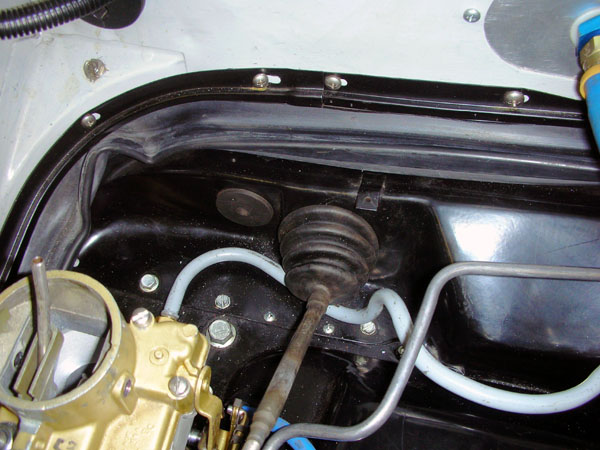
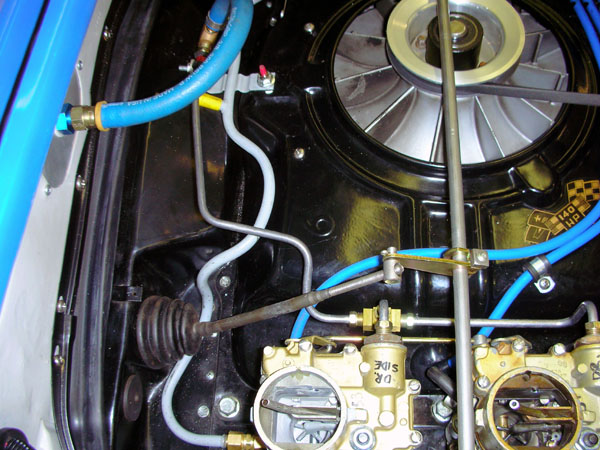
Another piece of the linkage that requires re-working is the accelerator rod coming through the fire wall. The instructions do mention you might have to play with it to get it to fit in the stock "rotated" configuration. When you reverse everything from the kit way the cross shaft moves closer to the firewall and the arm where the accelerator rod connects has to point up instead of down like on the stock cross shaft. This actually worked to my advantage. After removing the rod which is hardened, I heated it with a map gas torch and straightened the threaded end. Then after reinstalling for another fit up, I bent it up slightly close to the boot retainer nubs which provided a perfect alignment. The large hole in the engine sheet metal clears the up and down movement of the arm and the stock rubber boot can be used. I use a cotter pin to attach the clevis adjuster to the cross shaft arm. Also I had to use another spacer along with the one supplied in the kit adjust the side to side movement of the cross shaft align properly.
 |
 |
 |
 |
 |
 |
 |
||
| Accelerator rod and cross shaft fitting. | ||
|---|---|---|
All the pivot points on the accelerator linkage of my track car from the pedal back have been drilled for cotter pin attachment. Also I use small thin washers to shim these points up for a better fit. A small amount of white grease keeps it working smoothly. This insures nothing falls off in the heat of battle so to speak.
The trick to drilling a small cotter pin hole in a small round rod is to file a flat spot on it and center punch it if you can. A drill press works well here but not necessary.
 |
||
| Accelerator rod modified for cotter pin. | ||
|---|---|---|
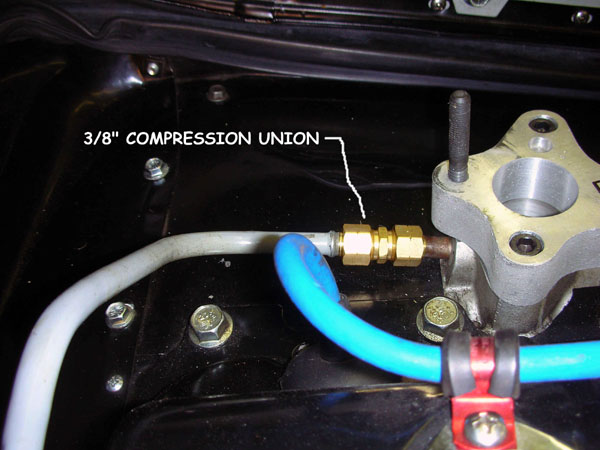
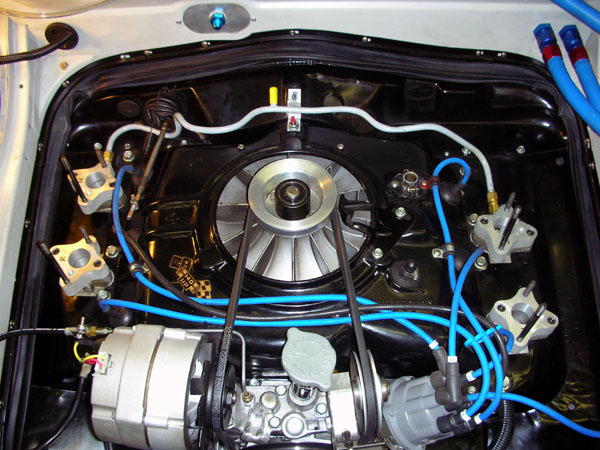
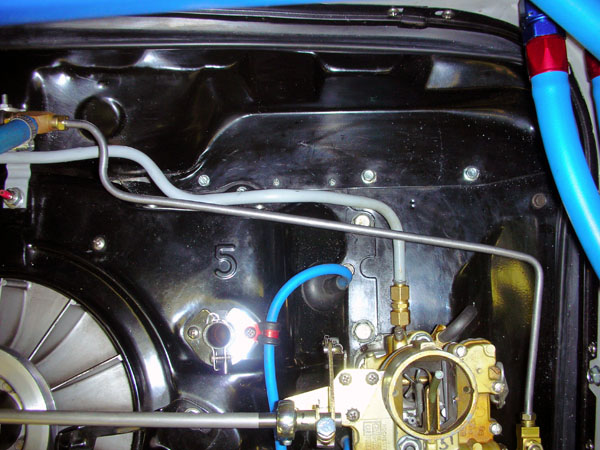
The fuel lines provided in the kit will work and in my case a little re-shaping put it all in order. Of course I use an electric fuel pump and my fuel lines are reversed to feed from the front of the engine. The stock mechanical pump location may require a little more redesign when you "rotate the rotators".
 |
 |
 |
| The finished product. | ||
|---|---|---|
Initial driving impression is it responds better and feels more positive. The secondaries come in much sooner which, in a track car is good. There is a little hint of bog at low speeds if you kick it down but having a working accelerator pump in the secondaries which I do is a plus here.
As usual, your mileage may vary!
Rick Norris
#36 Sunoco Corvair
10-30-2007