Custom Search


We're going to drive the car when it's ready, let's work on the place you'll be driving.
For our car we'd like to have both gauges and warning lights. The lights are to warn you that something's wrong right now, so you have a chance to shut the engine down before the problem gets more expensive than it already is. The gauges are to warn you that things are going out of range so you can fix it before something bad happens.
Stock Corvair gauge sets fall into two categories - the 500/700/Monza gauges, and the Spyder/Corsa packages. The first are just speedometer and fuel with a light for each of the generator/alternator and the oil pressure and over temperature. There was an optional clock too, on the late models that's what the center hole was for, earlies had it on top of the dash. If that's all you have, it's a good idea to consider either swapping in a Spyder/Corsa dash, or adding some aftermarket gauges.
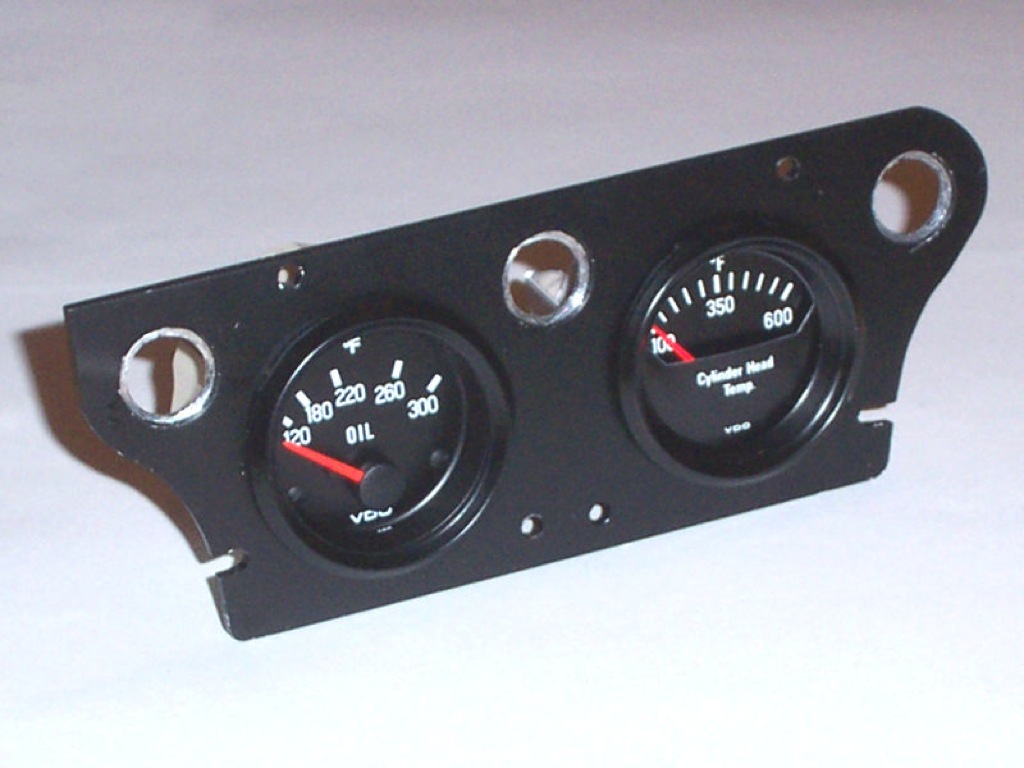
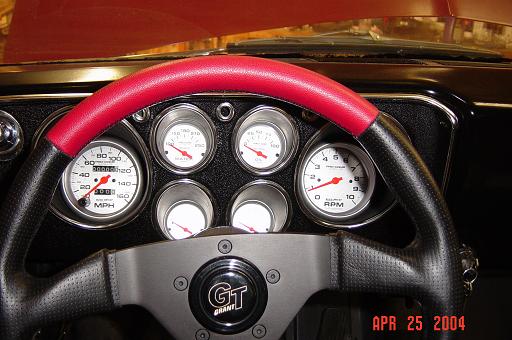
Having said that, the Spyder/Corsa dashes are still really not the best answer for a performance application. Both include speedometer, tach, fuel, head temp, pressure/vaccuum, and the Corsa has a clock. You should probably also consider oil pressure, oil temp, and a voltmeter. It's also possible to just use the cluster and put in your own combination of gauges, as in the photo - the four small gauge holes are 2 1/16", Speedo and Tach are 4". If you have a late model with the "3 hole" cluster, there's a neat 4-in-1 gauge you could use as well. See further below for several different options. Spyder dashes have 2 7/8" holes for tach and speedo, and 1 5/8" holes for the auxiliary gauges.
For warning lights, the two stock ones will inform you of the two most crucial failures - the fan belt and oil pressure. However, these can be improved in a couple of ways. First, the oil pressure switch is at such a low value that it's just telling you the engine has already self destructed - however several of the general high performance shops have a switch that will signal at a higher value. Second, the bulbs really aren't all that large or bright. Bob Slusher used a Corsa dash and replaced the head temp gauge and clock with big lights:
Note the extra gauges in the center of the dash.
His thoughts on the warning lights follow:
The attached dash photo shows the stock Corsa dash with a pair of yellow and red warning lamps in place of the existing top corsa gauges. I am currently working on installing a Autometer shift light in the bottom right gauge hole formerly occupied by the fuel gauge - not needed since the car has a Fuel Safe cell.
These simple lamps come in both led and incandescent. Large bins of then at the local NAPA store. The led units are very bright and were about $9.00 in either red or yellow. The incandescent units were about $2.50 each, again in both red or yellow. The best part is that either of the lamps slide right into the back of the Corsa dash with a near perfect fit. Only a light spot of glue on the edges to hold them in place. The back electrical connections are bullet connectors so nothing could be easier.
Ok, here is the one problem I encountered in the use of these lamps. One LED lamp (red) is for the oil pressure sender. I used the existing sender located on the alternator adaptor/oil filter housing. Works great and nice and bright red lamp. The yellow led light was to warn of a alternator failure/belt breakage. Problem was, it would not light even when the engine was off but the key was on. Come to find out that the stock circuit needs the tiny resistance provided by a incandescent bulb to work. Ok, so I wired a stock idiot light bulb into the circuit upstream of the LED lamp to provide that resistance, but the LED lamp still would not light. I changed the warning lamp to the NAPA incandescent model and it lit beautifully. Go figure? So I have both the incandescent and the led models. Both are right up there in the sightline and both are very bright. The LED model is just a little brighter, though either will be very hard to miss. Here are the NAPA part numbers:
Incandescent:
LIT 50-30200Y3 -- Yellow
LIT 50-30200R3 -- Red
LED:
LIT 3050A-3 -- Same number for Red or YellowBob
To wire up the alternator light, this tip from Larry Claypool may help:
gen light? not too much rocket science here. brown wire from the voltage regulator goes to one terminal of your new 'big' light. the other side of the circuit is power from the ignition switch, typically pink or black with a pink stripe. the trouble is that most marker lights have only 1 lead, the base is connected to ground. so you need to isolate the base so it does not ground, then connect the remaining wire to where the ground would normally be made on the light. or you could make own light, go to the parts store and get a socket with a base configuration like a corvair back up lamp bulb (1156), with dual pigtails. use a #1004 bulb. it has 15 CP, and uses the two leads to operate (does not use the base of the bulb for ground).
larry claypool
What we really want to know, of course, is has the fan belt come off? In that case it may be better to use a setup that detects pressure from the fan:
Smitty says:For the oil pressure switch, consider getting a higher PSI one from a racing supplier. You really don't want your race engine below about 30 PSI, but the stock switch comes on when the pressure is all the way down to 5. Be aware that with a high pressure switch it may come on at idle - but you can look at the gauge at that point.The pressure switch is as near as the closest junk automatic washer. The switch is the round device behind the water level knob in the control console. Plumb the pressure line into the turky roaster where it can read pressure there. A bus stop light will get your attention but may be overkill.
Head Temp Gauge:
The stock head temp gauge isn't very good in terms of absolute temp measurement, but it still is better than nothing. Better than that is an aftermarket gauge, either one per head, or one with two pickups you can switch back and forth. Most of these use a thermocouple that's intended to mount under a spark plug in place of the washer. Chevrolet did a fair amount of study on Corvair head temps, and they put the sensor for the stock gauge right at the back of the combustion chamber. Here's some help from Seth Emerson on installing your aftermarket pickup similar to stock:
A thermocouple is not like the thermistor that the Corvair Spyder/Corsa used. A "thermocouple" is a bi-metallic pair - two different metals - that, when heat (or cold, I guess) is applied, generates a mild current down the pair of wires. This voltage potential is what you read on your gage it changes with temperature applied. Of course, it is calibrated in degrees on the gauge face. The actual physical contact between the two wires is important because that contact is the origin of the voltage to the gage. That is why soldering of the pair is frowned upon, it connects the two wires physically, but can insulate them so they cannot form the current. I always used a crimp-on ring terminal, kind of like the one Stewart-Warner supplied for the Spark Plug Temp gage they used to sell. I removed the spark plug ring and crimped on a 3/8" ring that fit under a real short 3/8"-fine thread allen bolt. Those fit into the original thermistor threaded holes in the 140/150/180 heads.
That location is much more responsive in terms of a fast indicator of temp problems, than the location under the plug. It is right next to the exhaust valve seat. On 110 heads, it is an easy install, since the threads are coarse into the head, and much more likely to give-up their occupant. On the 140 heads, (and 150-180s for that matter), the threads are 3/8 fine. Removal of the stock thermistor and switch is "problematic" at best, and you may, indeed find yourself with broken-off parts or "threadless" holes left over. The thermocouple wires are designed to "take the heat" in that application, I wouldn't worry about them. Using them under the plugs - I suppose in lieu of the original plug gasket - might have some effect on the actual heat range of those plugs. Something to consider.
The best installation I ever saw, and the most work, was done by Doug Hargrove of Modesto, CA. Doug drilled out the centers of some small-hex bolts, commonly used as "header bolts", pushed the thermocouple wires through the bolt, installed a spring and a retainer on the wire tip and screwed it into the head. The actual thermocouple junction was pushed up against the end of the hole in the head, contacting the cylinder head metal a fraction of an inch from the exhaust seat portion of the head. When anything happened, Doug knew immediately.
- Seth Emerson
Tach in Late Model 500 or Monza Dash:
Jim Houston used the hole for the optional clock to fit a Sun tach in his '65 Monza dash:
Here's how he did it:
- Removed bezel and glass from tach
- Using hole saw, cut out Monza clock blank to fit tach
- Fitted the tach to the blank and secured with silicone around edges
- Installed blank in dash using stock screws.
- Spliced tach light wire to gray wire in dash harness.
- Secured tach power/sense wires to dash harness with tiewraps
Note: I used quick disconnects on the tach wires to allow easy removal of dash.
Hope this helps.
Jim
Click on an image to see the full size version. Images courtesy Jim Houston.
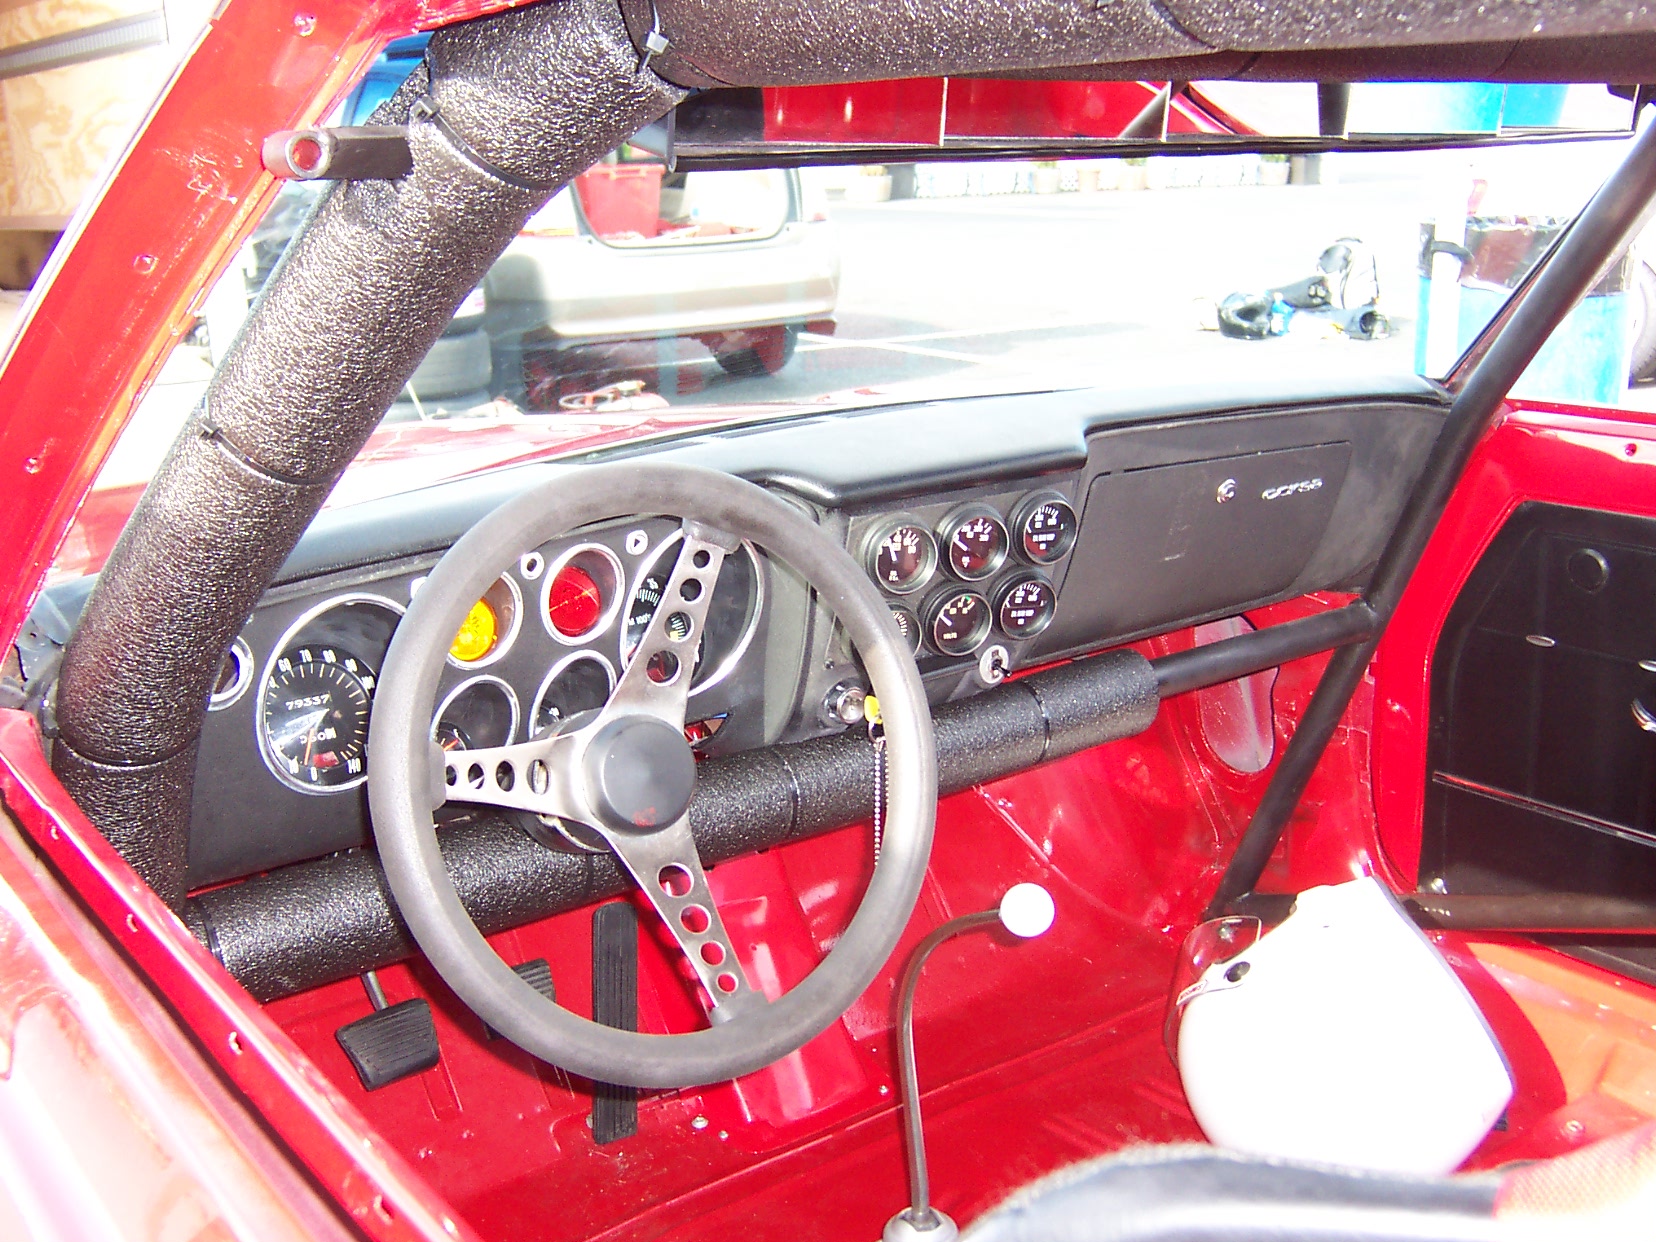
Corsa convertible replacement gauges:
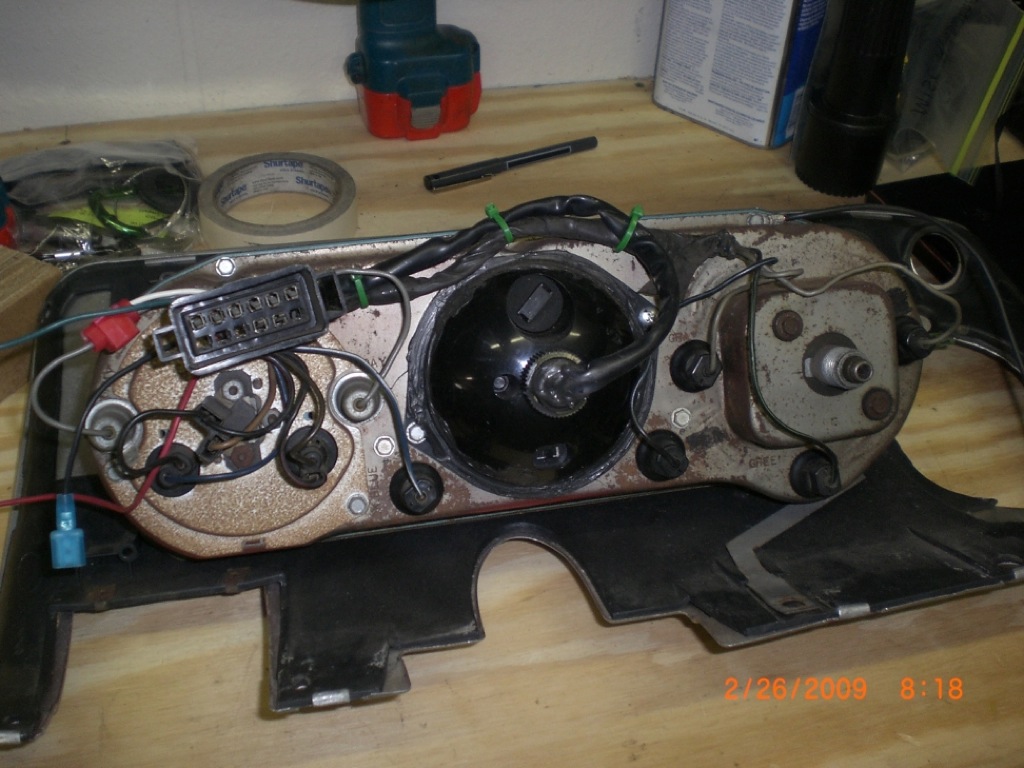
Roger Gault has a Corsa 'vert, which presented some challenges with glare when the top is down:

One thing hasn't been mentioned that might be important to convertable owners. All of the aftermarket gauges I've considered have the needle pivot off center. That means you can't use the conical lenses that go in front of the stock gauges because they really distort things and they have markings on them. If you take them out and put in the flat front gauges, that will work fine in a closed car, but the reflection of your shirt (or your handsome face) will make the gauges invisible in a brightly lit convertable. There was a reason GM put in those silly conical lenses.
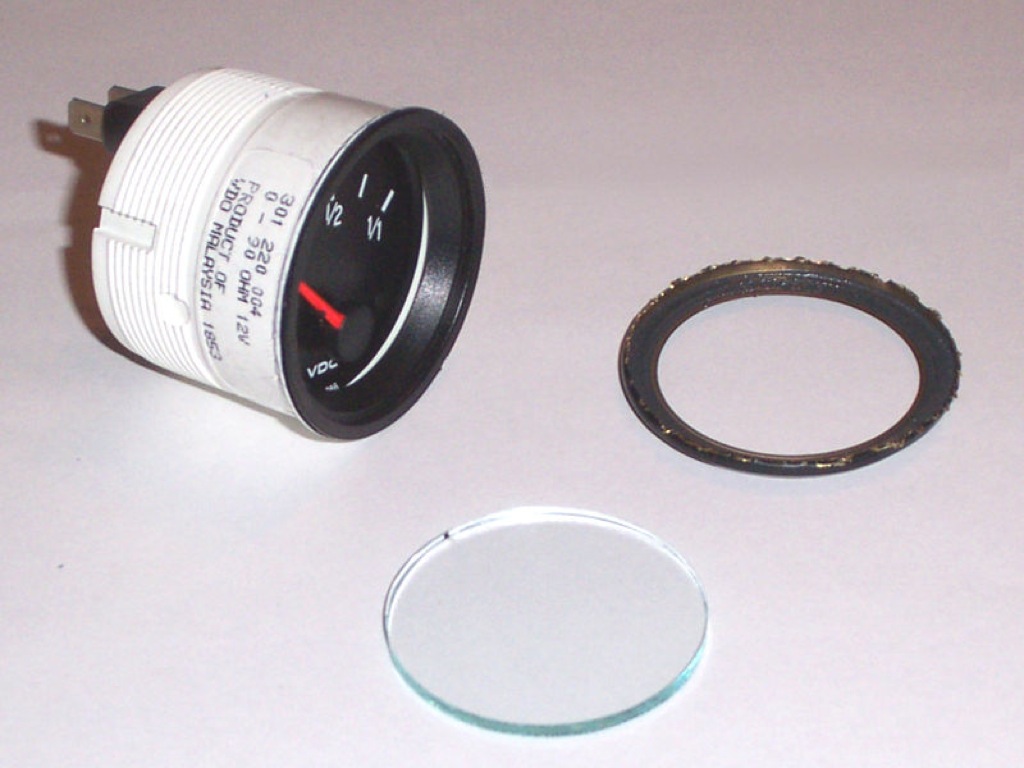
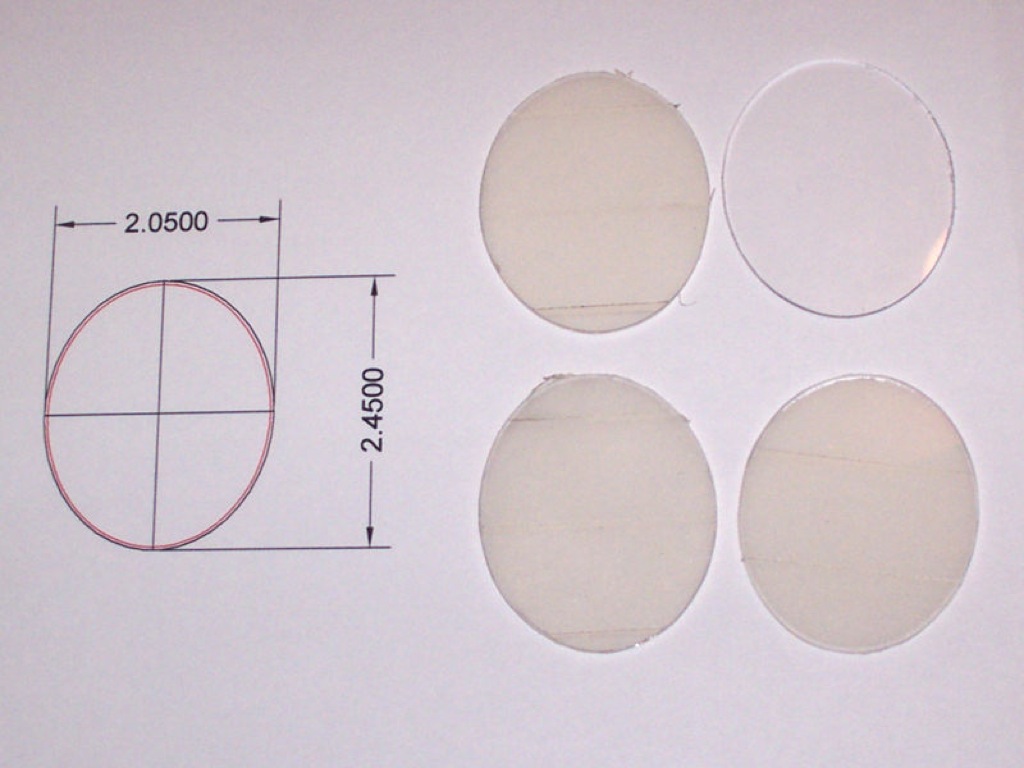
After getting very frustrated (and poor) trying to cast some lenses without markings, I ended up removing the flat glass from my VDO gauges and making flat oval lenses that mounts at an angle in front of the gauges. This acts something like the cones, and keeps the reflections from blocking the gauges.
- I disassembled the gauges to pull the glass out. Just bend the bezel away from the gauge with a small screwdriver. Put it back together w/o glass and pinch the edges with some pliers - really high tech.
- I made new lenses to put into the holes in the dash at an angle. They're just filed to fit closely in the hole and glued in place. The flash in the picture of the outside of the panel makes the sloppy work around the edges of the lenses really stand out. It's essentially invisible in real life, but it's still sloppy work. ;-)
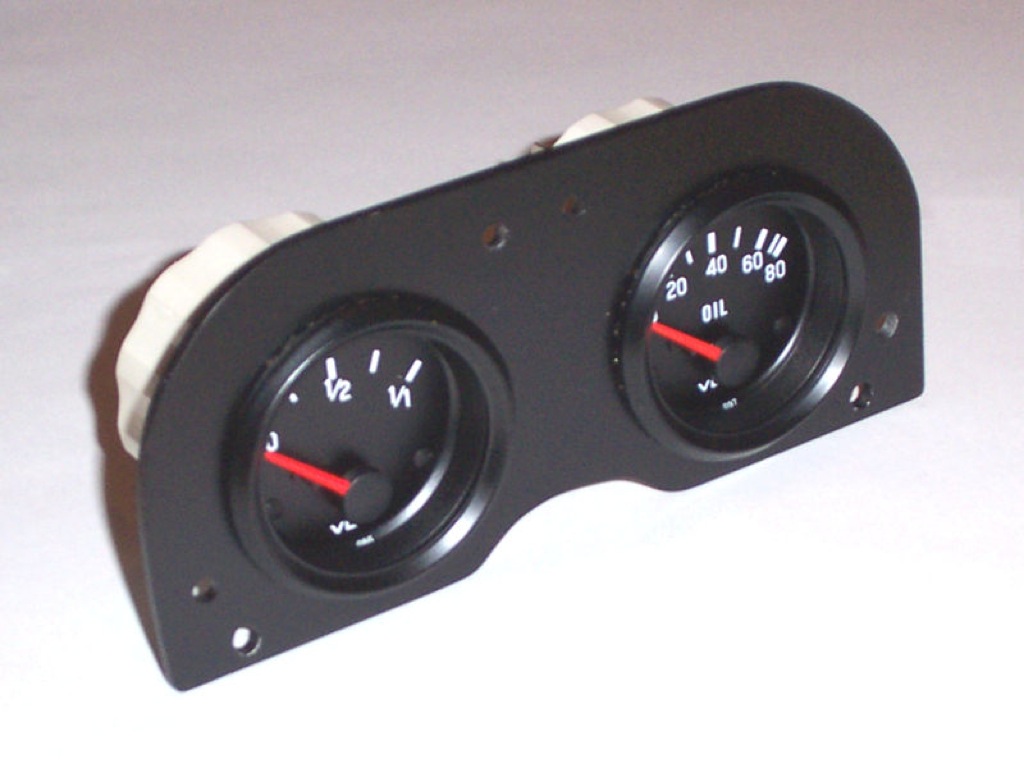
- I made the gauge mounting panels out of 1/8" aluminum. Note I had to counterbore the holes for the signal lights and bright indicator so the stock lamps would snap in (and ground).
- Top view shows it back together.
PS: The switch you may see is to switch two different thermocouple rings to the CHT gauge so I can look at both heads.
Roger
Click on an image to see the full size version. Images courtesy Roger Gault.
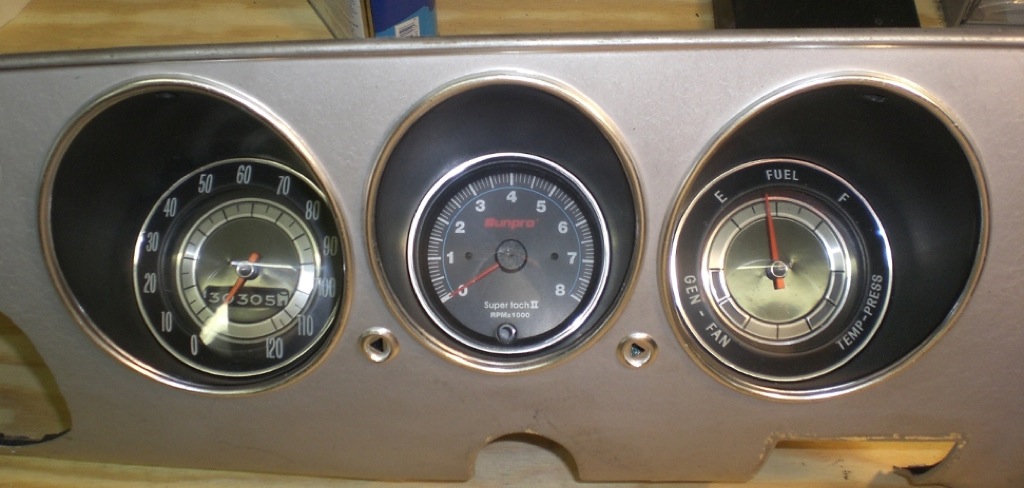
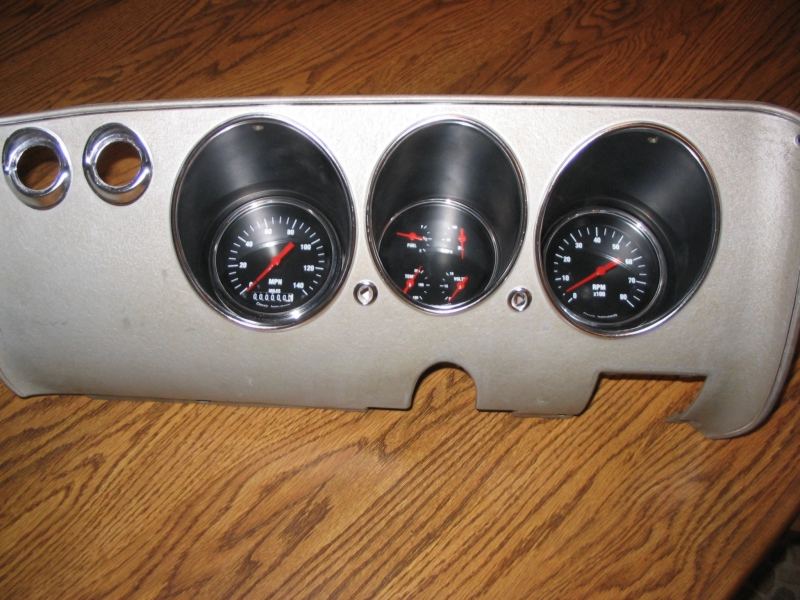
Monza Dash complete gauge replacement:
There's a neat 4 in 1 gauge made by Classic Instruments, Dave Keillor used their gauges and created a really useful gauge cluster. Here's his post to FastVair on the subject:
I should clarify that the car I'm building is a performance street car, not a race car (I apologize for the sacrilege of mentioning a street car on this racing forum <ggg>). The over-temperature setting will be determined by observing the head temperatures under various conditions of speed, ambient, and load; then setting the limit somewhere between what I find in the testing and the factory snap switch. Exactly where will be determined by "engineering judgment" based on my interpretation of the test results. My goal is to have an early warning when/if the temperature climbs to an abnormally high, but not yet damaging, level.
I looked for gauges with a limit setting, but couldn't find anything except digital. Also, I believe if you're going to use a limit indicator, the gauge also needs to be compensated. In Minnesota, we see wide swings in ambient during the warm weather months (even wider in the winter, but the toy cars aren't allowed out to play in the winter). With a wide error range it's difficult to know where to set the limit.
Another consideration is sight line. My CHT gauges will be mounted in a center console along with the Safeguard monitor. The Monza instrument cluster is full with speedometer, tachometer, and a quad cluster in the clock position, so I'm building a console to hold the overflow. Because they will be that far out of normal line of sight, I wanted an attention-getting visual indicator. In addition to an oil pressure gauge (analog), I'm retaining the factory snap switch and mounting an idiot light at the top of the instrument cluster between the former clock opening and the former fuel gauge opening. The indicator for Warren's fan-belt-ain't-there-no-more pressure switch will be between the speedometer opening and the former clock opening.
Click on an image to see the full size version. Images courtesy Dave Keillor.
The Corvair shifter has to be considerably longer than on a front engined car, I've got a page on that and other transaxle related items here.
Since Corvairs have an unusual floor pan for the day, there wasn't much that would bolt in "back when". With the popularity of FWD cars, there are more possibilities now. Be aware that there isn't anything that I've seen that is a true bolt in, but the adaptation isn't too hard. For an example, take a look at Jim Briggs' installation here.
One important thing to realize as well is that there are several different Corvair seat mounting patterns. Again, a note from Larry Claypool explains the details:
I just wanted to remind anyone thinking of such that there are 4 different Corvair seat bolt patterns: 62/64, 65/66, and 67/69, all increasingly narrower. 60/61 uses a different set up entirely with clamps rather than a direct bolt in at the front. SO.....what worked in one corvair will not necessarily "bolt in" to another. Moral - bring your tape measure and specs when seat shopping.
larry claypool